3 point lighting is a cinematography technique that uses three different light sources placed at various distances and angles around a subject to properly light them for the screen. Each light source serves a different purpose in casting and correcting shadows on your subject. The three light sources used in this setup are:
- Key light: This primary light makes up about 3/4 of the light on a subject.
- Fill light: This secondary light is meant to fill the remaining unlit space to bring out further detail of the subject.
- Back light: Sometimes referred to as a “rim light” or “hair light,” this final light in the three-point setup is meant to define the outline of the subject to emphasize three-dimensionality.
The three-point lighting technique is used by many professional filmmakers, no matter the genre. Cinematographers, light designers, and other production design professionals utilize the technique in dramas, comedies, commercials, documentaries, and many other video projects. It’s important to properly light a visual storytelling project for many reasons, including to:
- Ensure the audience can see the subject(s), props, and settings as intended in the story.
- Correct shifting natural light as you shoot a scene or sequence for continuity and consistency.
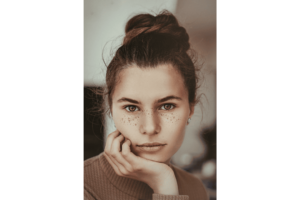
- Supplement natural light and capture the subject in a flattering way, if intended.
- Achieve more unnatural lighting looks for different genres, themes, and moods.
You can learn how to best set up these three light sources to capture your subjects and their scenery to suit your visual story.
How to Set Up Three-Point Lighting
There are standard guidelines to ensure you place each light in the setup in the right place to get the best combination of light, shadows, and depth for each shot. Here are the steps in using the three-point lighting technique to illuminate a scene:
Turn off all other lights
Starting in the dark, or with as little unnatural light as possible, is the best way to gauge how much light you’re casting on your subject during the process. You can also use a light meter, which is a filmmaking and photography tool that measure how strong light is on a surface, such as a subject’s face. This tool measures lights in lumens, and you can track this number to ensure consistency as you shoot.
Set up the key light first
Place the light — which is on a stand — at an angle to the subject rather than facing them head-on, that way the light does not shine directly onto their face, creating a flat, unflattering, and shadowless look. The angle at which it’s placed from the camera depends on how intense you want the light to shine on the subject as well as the length of the shadows. Try between a 30- and 45-degree angle from the camera to achieve the look you want. Many cinematographers in the industry stick with 45 degrees. As for how bright it should be, that also depends on the look you’re going for. You can make it as bright or dim as you need to.
Add the fill light next
The fill light is typically dimmer than the key light and mirrors the key light’s position and angle on the other side of the subject and camera. It should be the same angle from the camera and the same angle tilted to face the subject as well. If you want more subtle light to fill in the shadows created by the key light, try replacing a second light with a reflector, wall, or another flat surface that reflects light back onto the subject. Generally the key light to fill light intensity ratio is 2:1, but might be 1.5:1 for commercials. Decreasing the light intensity can be done by diffusing, dimming, or moving the light further away.
Position the back light
Place this light opposite from the key light and behind a subject — but out of frame — to create a flattering “rim” of light around the subject’s outline. This allows the subject to clearly stand out from the background, promoting more three-dimensionality when filmed. In the industry, many cinematographers point the light toward the back of the subject’s neck as a simple reference marker.
Use the optional fourth light.
You can add a fourth light to your setup to further separate your subject from their background. Place another light behind your subject but very low to the ground so the camera doesn’t capture it. Tilt the light up to illuminate a wall, a backdrop of props, the room behind the subject, the outdoor setting, or another background you want to light better.
Ways to Get Creative With Three-Point Lighting
With the flexibility of the three-point lighting technique, you can customize this standard setup to get the right composition of light and shadows that makes each frame engaging for an audience. Here are some additional tips to consider when preparing your next lighting setup:
- Give the light a motivation: Characters are not the only parts of a visual story that can have motivation. When deciding how you want the light to look in a scene, make sure that your light source makes sense for the location, the purpose and mood of the scene, and for the tone of the film overall.
- Use the script to help you make lighting decisions: Use the scene headings first to help you decide whether your scene and its lighting setup should be interior or exterior. Then, reference the scene description in the action lines. Look for words and phrases that emphasize the mood of the setting, such as “eerie,” “sunny,” or “deserted.” Finally, the tone of the script and its genre can also guide you in how harsh or soft your shadows should be.
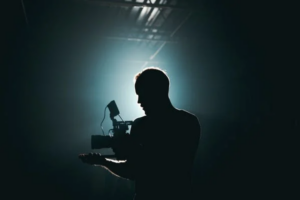
- Capture the mood of a scene: Sometimes you want to play with the audience’s ability to see people, objects, or settings in a scene. Maybe you want to create harsh shadows on a person’s face to create mystery, like in a noir, horror, or thriller film. Perhaps you use harsh backlight that obscures the subject’s details from being seen at all, leaving them just a dark silhouette against a lot of light, which can help during a big reveal.
- Mimic the time of day: Every time of day looks different from one another, especially between large time spans. Early morning looks very different from high noon and golden hour. If your scene takes place inside during a specific time of day, and you’re not able to shoot during that time of day, you can strategically place the three-point light setup to achieve the right daytime, evening, or night look. When mimicking afternoon sun, you would place the key light lower than you would for high noon sun to make sure the angles of the light more accurately reflect that time of day.
- Play with light size, distance, and brightness: The size of a light can determine how hard or soft the shadows are. Smaller lights create harder shadows since the light is more condensed, whereas larger lights create softer shadows since the light is more dispersed. Likewise, how close a light is to a subject can also adjust the hardness or softness of the shadows. The closer the light, the softer the shadows. Mix these choices in with how bright or dim you make each light source. The brighter the light, the harder the shadows.
Using the Bescore Photon LED 3-Light Kit is a good way to get started with its bi-color, flicker-free lighting system with a CRI rating of 95 and light stands and plug-in ability. Mastering the behind-the-scene techniques can ensure every frame you shoot is dynamic and well-composed, capturing the audience’s attention. In addition, knowing how to set up industry-standard lighting, among other production tasks, can help you become a more skilled and professional filmmaker. NFI prepares you with the skills, knowledge, practical experience, and portfolio to help you find work in the industry, including film, television, and other media careers.