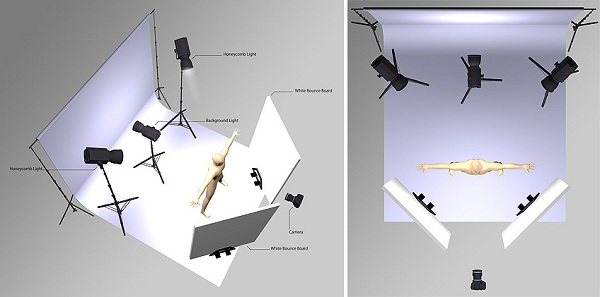
Bounce light is used in everything from low-budget short films to big-budget Hollywood movies. There are a lot of factors that go into putting together the best lighting setup for a shot. The placement of lights, the types of lights you employ, and the quality of light you produce are all important.
What is Bounce Light?
Bounce lighting is a technique of lighting in which the light from a vital light source is bounced off of a bounce board, or another light-colored surface. A reflected light causes a broader light than its source. You can also diffuse the light onto a subject.
When is Bounce Lighting Used?
Bounce lighting is used in a variety of lighting approaches. Its ability to diffuse and soften light makes it an excellent tool for filmmakers who want to achieve natural or soft lighting effects. Take a look at how to bounce lighting relates to other types of light and lighting setups in movies. Take note of the differences in shadows and the subject’s detail.
Bounced light’s visual appearance is also an efficient approach to generating softer lighting. When photographing in dark or enclosed places, this is especially true. For example, if you were to shoot a scene in a tiny bedroom, setting up a silk or diffusion to produce softer light may be challenging.
Simply pointing your light source at a wall, on the other hand, can broaden the light’s distribution and dilute it for a softer look. Every filmmaker should be familiar with bouncing light, which is one of the fundamentals of cinema lighting.
Objects Used to Create Bounce Lighting
- Bounce card
- Reflector board
- White Walls and ceilings
- Clothing and fabric
- Other reflective surfaces like water, tiles, and a white floor.
- Props such as books, among others.
Why is Bounce Light Used?
You can use bounce lights to solve a lighting problem or improve a photo’s composition. Here are a few good reasons to use bounce lighting.
Bounce Light Diffuses the Light
You can dilute the light source using bounce lighting. When light is diffused, it scatters as if it were not originating from a direct light source. Diffusion of light allows you to film a scene with light that is uniformly distributed.
It is frequent in high-key lighting and natural light setups to diffuse the light source, spread it out more evenly, and create a softer look. Diffusing the light makes a soft image ideal for photographing outdoors.
How to use a REFLECTOR the right way! STOP using REFLECTORS to make bad outdoor portrait lighting
Lighting using a Reflector – Photography Tutorial
Bounce Light is a Great Partner to Natural Light
Bounce lighting complements natural light. It is a filmmaker’s dream come true. It is inexpensive and provides an exceptionally detailed lighting setup that will take your scenario to the next level. The bounce lighting arrangement allows you to manipulate natural light to distribute it over your subject evenly and may be molded to fit the scene. In addition, it softens the light, allowing you to take advantage of more natural light throughout the day. Unfortunately, due to overexposure and severe contrasts, you may be limited to the time of day when you can use natural light to light up the photo.
You will be shooting with natural light like a pro in no time if you use some light material or a bounce board.
Bounce Light is Affordable
Yes, if you are on a limited budget or shooting a low-budget or no-budget film, bounce lighting may be the way to go. As previously stated, it is the ideal partner for photographing with natural light. In addition, it is not necessary to spend a lot of money to make a bounce board, use the material to bounce light onto your subject, or even diffuse a present light source.
Light material, such as that found on Amazon or at your local fabric store, can be used to help bounce the light. In addition, going to a nearby hardware store will allow you to purchase a board that will adequately reflect the light.
Take a look around and see what you can come up with, but the most important thing is to make sure the photo is lined up appropriately and that the light source is agreed upon ahead of time. When photographing with natural light, it is essential to plan.
Bounce Light can be Produced in Limited Space
Lighting sets can be rather large and take up a lot of room. You may record in a small room or a narrow location, and a full-light setup will not be possible. However, You can use bounce lighting to illuminate the shot correctly. Set up a direct light aiming toward the subject. You can use any extra lights in the location using a bounce card or other suitable material.
In a small, constrained environment, this will help you disperse the light and illuminate your scene professionally. You will be surprised at how wonderfully this arrangement turns out.
Tips on Utilizing Bounce Lighting
The way you employ bouncing light (or any light) depends entirely on the scene you’re working. Consider the following aspects for your shot:
- Feathering of the shadows
- The softness of the light
- The angle of the light and the shadows it forms
Small Changes Can Have a Tremendous Impact
Small modifications can make a big difference when utilizing a bounce board or simply bouncing light off a wall or ceiling. You can capture the best pictures with the following appropriate settings:
- The angle of the bounce board
- Light angle
- The distance between the light source and the bounce surface
Take note of how minor changes are made to the shot. For example, try adjusting the bounce if the shadows or light in your image are not working for you.
Setups for Bounce Lighting That Have Been Improved
Any cinematographer can benefit from bounced light. However, it is crucial to remember that you can use them with other tools. Bounce lighting, for example, is an integral part of another method known as book lighting. Simply bouncing the light through a diffuser to generate the softest light possible is what book lighting is all about.
You can use bounce lighting in a 3-point lighting configuration as well. It is usually utilized as a soft fill light to balance out the key/fill lighting ratio. You can also use it to create a distinction.
The Color of your Bounce Surface
Bounce lighting can also be employed in a three-point lighting setup. It is most commonly used as a soft fill light to help balance the key/fill lighting ratio. As a bounce light, it can also be utilized to create distinction.
How To Choose The Right Reflector for Your Photography
Avoid Using Bright Lights
The use of bouncing lights that generate a lot of heat can be hazardous. When bounce cards and cloth are exposed to intense heat, they can burn and catch fire. When bouncing light, use low-temperature lights such as LEDs or HMIs.
DIY Light Bounce Board
Bouncing light is fantastic since it is a cost-effective tool for all filmmakers. With a trip to the local hardware shop, you can make bounce boards for as little as $15 to $40.
DIY Bounce Board & Interview Lighting!
DIY Bounce Board and Diffusion
Be Creative
The nice thing about photography is that rules exist more as a guideline to let you explore and uncover new ways of framing the world rather than as processes to be meticulously followed. Many outstanding photographers have achieved their best results by defying industry standards and entirely dismissing what they have taught. You are free to disregard anything you have read on this list; go out, get creative with your photographs, and enjoy yourself.
How to Use a Reflector: Breathe Your Passion with Vanessa Joy
Seek Direction
Choosing a direction to bounce light might be difficult for beginners. Most people direct their flash at the ceiling, which is fine for essential product pictures because the bouncing light acts as a soft spotlight. However, doing so for photographs of humans can result in unpleasant results (after all, no one likes shadows beneath their eyes).
Better Lighting for Your Videos: Flags, Bounce, Diffusion
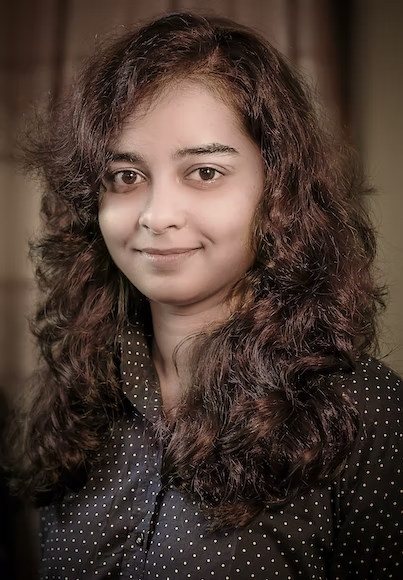
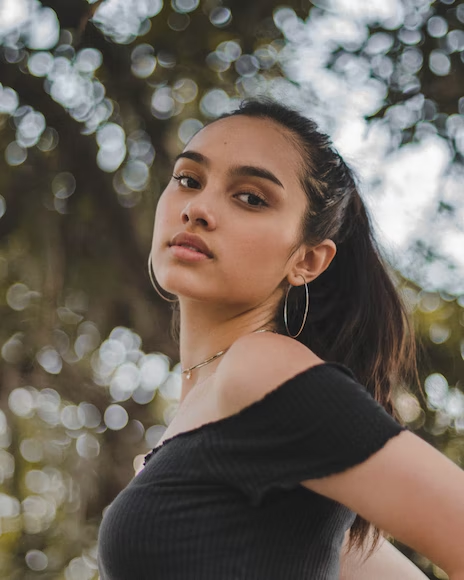
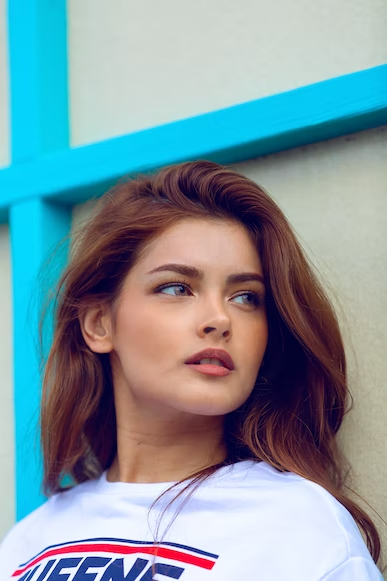
Directional light is essential for dynamic portraiture. The subject’s face is given a faint shadow by bouncing light from above and behind or from the side, playing up or highlighting certain features while also providing a slimming appearance.
Imagine that the surface you are utilizing is the light source itself, a valuable method to remember. Then, before pressing the shutter, position your subject as needed, set your flash to your preferred surface, and frame your photo.
Light Beautifully with Bounce Light
Different Ways to Bounce Light
Bounce Light From a Portable Reflector
The most basic method of bouncing light used by portrait photographers is a handheld reflector. While the leading light is hitting one side of your subject, you can place the reflector on the opposite side and highlight the opposite side of the face. This reduces the number of unwanted shadows in your portrait, making it less textured and less rough.
15 Hacks for using Reflectors in Video
You can also use a reflector to transform a small light source (such as a strobe) into a wide or broad light source. This way, you can change a tiny light source with harsh and unpleasant light into a vast light source with gentle and complimentary light. Tremendous diffused lights are flattering. Doing this will significantly impact the final photo.
Bounce Light From Different Reflector Sizes
When it comes to bouncing light off reflectors, size counts since various surface areas alter light’s hardness and softness. Softer light is achieved by using a larger reflector. Smaller ones have the reverse effect, though the light is still much weaker than the original, direct source.
Multiple Light to Bounce Light
To make a more unique-illuminated group portrait, use a few tiny reflectors instead of simply one large reflector. If a single reflector is not enough to generate the desired lighting effect for a group of four or five people, use smaller glasses for those who need additional light. Even though you will need more hands to hold all of the reflectors, you’ll get more excellent illumination in the end.
Watch BEFORE YOU BUY a Portrait Photography Reflector
Bouncing Light Using a White Wall or Gray Wall
Vast white solid objects, which bounce back a lot of soft light and cover a large area, are some of the best reflected light sources. White walls serve as large reflectors. To achieve the soft-fill light effect, position your subject(s) next to or near a white fence with sunshine bouncing off it.

White Floors and Water to Bounce Light
White walls are not the only way to provide wonderful fill light to pictures; white floors may also be used to bounce light. This brightens the under-eye, nose, and chin areas, especially when the light comes from above. As an alternative, you can use bodies of water. One of the reasons beach photos are so beautiful is because of this.
Bouncing Light off Ceiling
When you do not have time to set up your hot shoe flash off-camera and shoot portraits at an event, you can bounce the light off the ceiling. Allowing light to bounce down from the top produces a more significant effect than straight light from the front. It not only prevents red-eye, but it also prevents the mug-shot appearance that direct, frontal light causes. Ensure that the ceiling is light in color, perhaps white or a very light gray. It should not be too high because the distance between the primary light source and the ceiling impacts illumination.
White Rooms to Bounce Light
You do not have to limit yourself to white ceilings, walls, or flooring. Why don’t you give them all a shot? Find a room that contains all three and take a snapshot there. This is useful when you don’t have many light sources but still want a lot of light. In a space where everything is white, a small quantity of light from a window or a strobe may accomplish wonders. You now see why some portrait studios use this setup.
Bouncing Light: The Breakdown with Miguel Quiles
Use a Bounce Card to Bounce Light
Some flash units come equipped with built-in bounce cards that you can use to dilute light. It is a small white card that operates simultaneously, bouncing light off the ceiling. Still, it is directly on your hot shoe flash. When you do not have the luxury of getting your hot shoe flashes off the camera, and you do not have a white ceiling, or the roof is too high, this is an excellent alternative to utilizing your flash straight on your subject. Those who do not have access to the card can create their DIY copies.
Bounce Strong Backlight as Fill-Light
We all adore the rim lighting effect, which uses the backlight to form an outline of our subjects. If you don’t have any other light sources to illuminate the face, bounce back the same light as the fill light—photograph with the wall as your background. Also, use a reflector to put the wall in front of the subject. By bouncing the light back, you can better show the features in the backdrop. When you select to expose the backlit face appropriately, you avoid silhouettes or blown-out highlights.
Bouncing Light on Colored Surfaces
As white and light gray are neutral hues, they are always recommended for bouncing backlight. However, if you want to add some color, choose the colored route. For example, if you use a pink-colored board or wall, it will reflect the pink tone of your subject. This method also works with colored light diffusers.
Use Metallic Surfaces to Bounce Light
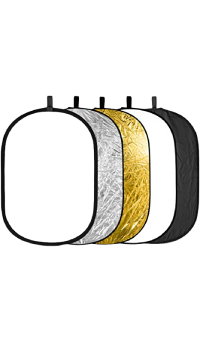
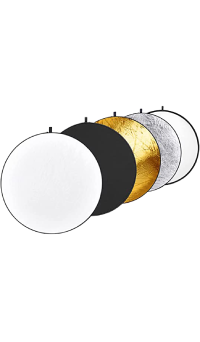
Golden surfaces are ideal for a natural, warm appearance. You can use it to create a sunset or fill light. 5-in-1 reflectors with gold and silversides are available for purchase at photography retailers. Silver ones have a calmer tone, ideal for individuals who prefer a little more punch without the warmth.
Use a Prop to Bounce Light
The majority of reflectors are primarily employed to aid in light distribution. Therefore, they are not frequently included in the frame. Others, though, might be used as part of the frame. It serves as both a lighting accent and a component of your image. These are only a few examples:
- Leaning against a white wall
- Relying on a white countertop
- Sitting on the floor
Photography Quick Tip – How to bounce light with Foam Core – Lighting Techniques
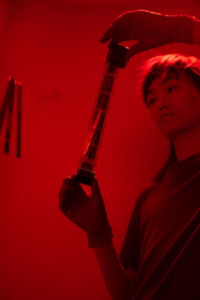
Gallery

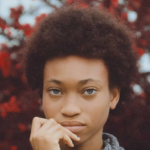

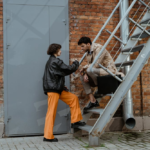

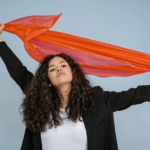

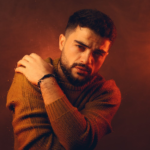
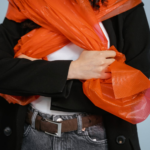
Image Sources: O’Reilly Media, Pinterest.
Conclusion
The top cinematographers in the world utilize bouncing lightly as a powerful technique. It will take some practice to understand how it might help your shot. However, getting started is as simple as going to your local hardware shop or, even more accessible, bouncing light against a wall. Experiment with various angles and positions to better grasp how it works and how you can apply it to your next project. Bounce lighting is a fantastic technique for complimenting other types of lighting, such as natural or soft lighting. It aids in creating a cinematic look and can take a standard lighting setup to the next level.
You can utilize bounce boards or material to diffuse natural light and evenly spread it across your shot, especially at the high exposure end of the range.
There have been some incredible moments shot with bounce lighting, and we can promise you that this is essential when perfecting your lighting setup.