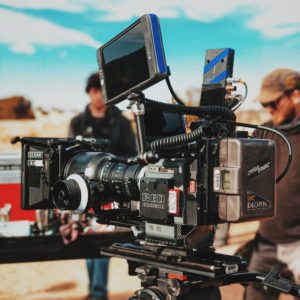
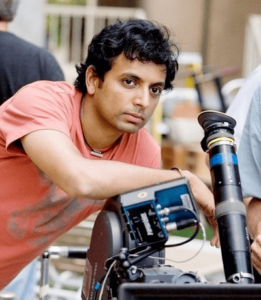
Camera movement terms describe the actions of this tool as filmmakers move it and adjust various settings while shooting a scene. Many of these movements are designed to make viewers feel like they — rather than the camera — are moving. Camera movements can:
- Emphasize the importance of scenes: With the right movements, you can add emotion and gravity to key scenes.
- Guide audiences: Using different movements allows you to attract and retain your audience’s attention.
- Transition for shot combinations: Many camera movements combine multiple techniques, giving you more options to tell a compelling story.
Filmmakers have used camera movements since the early 20th century. Here’s how they have developed over time:
- Early Development: Around the turn of the 20th century, cameraman Eugenio Promio started mounting his camera on moving objects, such as trains, cars, and gondolas. Soon after, filmmakers began mounting cameras on swivel heads to create movement.
- Rise of Narrative: Legendary filmmakers F.W. Murnau and Dziga Vertov used camera movements to tell stories in their silent films.
- Transition to Sound: When films began to incorporate sound, camera movement paused to avoid adding unnecessary noise. However, in the 1930s and 1940s, filmmakers developed techniques for adding movement without noise.
- Postwar Period: Lightweight hand-held cameras and Steadicams became popular by midcentury, giving filmmakers new methods for movement.
- Today: In the 21st century, filmmakers use an impressive range of camera movements to add new layers of meaning to their stories.
17 Camera Movements
Using the right camera movements can help you enhance your cinematography techniques and get the ideal shot for the scene. Take a look at 17 camera movements that every filmmaker should know.
Aerial Shot
Aerial shots show the subject from far above. Filmmakers often use drones or cranes for aerial shots.
Arc
An arc moves the camera in a circle without breaking its focus on a character or object in the scene. You can move the camera to the left or right of its center point to create an arc.
Cant
Similar to panning, canting reflects sideways movement without adjusting the camera’s location. However, canting tilts rather than rotates the camera. You can cant right or cant left to show movement.
Crane
To get a crane shot, position the camera on a fixed boom. Then rotate the camera up or down on the U-axis.
“Back to the Future” uses the crane shot to show the main characters speeding off in the DeLorean.
Dolly
A dolly shot uses a track or a motor to move the camera forward or backward. The best dolly shots use a stable, stationary track that allows the camera to move smoothly.
Here’s another example from Alfred Hitchcock’s “Frenzy.”
Dolly Zoom
This movement combines dolly and zoom techniques, moving the camera on a track toward or away from the subject while simultaneously changing the zoom so that the subject stays the same size. With dolly zoom, you can create an expansion or contraction effect.
Follow
To use this technique, simply follow the subject with the camera from a relatively consistent distance. With the follow technique, you can better show the subject’s perspective.
Handheld
This technique requires a hand-held camera rather than positioning the camera on a pedestal or tripod. A hand-held technique often looks less stable and creates a sense of urgency.
Locked Down
As the most basic option, a locked-down shot requires zero movement. To create a locked-down shot, fix the camera in place with a tripod and start filming.
Pan
Panning involves moving the camera horizontally without changing its position. To pan, fix the camera’s base in place and change the direction that the lens faces to the right or left.
Pedestal
To create a pedestal shot, fix the camera in place on an adjustable tripod. Then move the camera vertically by adjusting the pedestal or tripod.
Rack Focus
Rack focus involves changing the lens’s focus from one item to another in a continuous shot. When done correctly, the first object you focus on will go from being crisp and in-focus to blurry and out-of-focus when you shift to the second object. This technique works well to shift the audience’s attention from one element of the shot to another.
Steadicam
To use this technique, you need a Steadicam, which is a camera mount that stabilizes the camera. Because it’s wearable, it allows the camera operator to move freely while maintaining a steady, fluid shot.
Tilt
Tilting involves moving the camera vertically, either up or down. Similar to panning, tilting requires you to keep the camera stationary while changing where it focuses. Most tilt shots require a tripod.
Tongue
To get a tongue shot, place the camera on a fixed boom. Then rotate the camera left or right on the V-axis.
Truck or Crab
Similar to a dolly shot, a truck shot uses a track or a motor to move the camera from left to right. Trucking works best with a frictionless track, while crabbing reflects more crab-like sideways movements.
Zoom
One of the most common camera movements, zooming is also one of the easiest to execute. You can zoom in on a character or an object in the scene to encourage viewers to focus their attention on that element.
After trying these standard movements, you can get more creative with camera movements, like how the filmmakers for this Matt and Kim video:
10 Camera Shots and Angles
When you make a film, you can use countless techniques to get the right shot. Find out when to add these essential camera shots and angles to your shot list.
Close Shot
A close shot highlights the subject’s face and frames them from the forehead to the chin. Using close shots can help viewers make a personal connection to the character.
Down or High-Angle Shot
Also known as a high-angle shot, a down shot looks down at the subject, making them look vulnerable. To get a down shot, place the camera above the subject and point it down.
Extreme Close Shot
An extreme close shot takes a close shot to the next level by focusing on a certain part of the face. These shots often highlight a character’s eyes or mouth.
Establishing Shot
Establishing shots reveal the environment, provide context, and set the scene. They’re typically long shots that show place and time.
Full Shot
A full shot frames the subject’s body from head to toe. Rather than showing emotion, a full shot often highlights action and movement.
Medium Shot
Also known as a three-quarter shot, a medium shot frames the subject from the knees up. Although it focuses on the character, a medium shot also features the background or setting.
Over-the-Shoulder Shot
An over-the-shoulder shot frames the subject from behind the shoulder of another character in the scene. These shots create connections between two characters and can be either medium or close shots.
Point-of-View Shot
A point-of-view shot shows action from the perspective of a character. It can help the audience see and feel what the character is experiencing and helps make a more personal connection with the character.
Two Shot
Two shots include two subjects in the same frame. These shots often reveal relationships between the two characters or convey emotions.
Up or Low-Angle Shot
Also known as a low-angle shot, an up shot looks up at the subject and gives them a sense of power. To set up an up shot, you have to position the camera below the subject’s eye level.
These camera movements and shots can be used for a variety of filmmaking projects, from music videos and documentaries to short films and feature-length movies. You can learn more about camera movements and how you can improve your skills by applying to the Nashville Film Institute here.