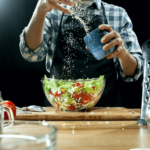
Cooking photography is a subset of food photography that focuses on capturing the process of preparing and cooking dishes. It brings the art and science of cooking to life, showcasing ingredients, techniques, and the culinary journey. From step-by-step recipe illustrations to behind-the-scenes kitchen shots, cooking photography provides a visual narrative of the cooking experience. It’s a valuable resource for home cooks, chefs, and food enthusiasts, offering inspiration, guidance, and a deeper appreciation for the culinary world. This genre combines culinary expertise with photography skills to capture the magic that happens in the kitchen. Explore the artistry of culinary creation through captivating cooking photography.

What is Cooking Photography?
Cooking photography is a genre of photography that specifically focuses on capturing images related to the process of preparing and cooking food. It involves photographing various stages of cooking, ingredients, cooking techniques, kitchen equipment, and the final plated dishes. Cooking photography can be used in cookbooks, culinary blogs, food magazines, and social media to illustrate recipes, demonstrate cooking methods, or showcase the artistry of food preparation. It often requires a combination of food styling, lighting, and composition techniques to convey the essence and appeal of cooking visually.
How Do You Take Pictures While Cooking?
Taking pictures while cooking involves a few key steps to ensure you capture appealing and informative images of the cooking process. Here’s a guide:
Preparation
- Gather your camera equipment, including your camera or smartphone, with a good quality camera, tripod, and any additional lighting equipment if needed.
- Clean your camera lens to ensure clear and sharp images.
Plan Your Shots
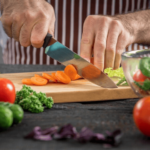
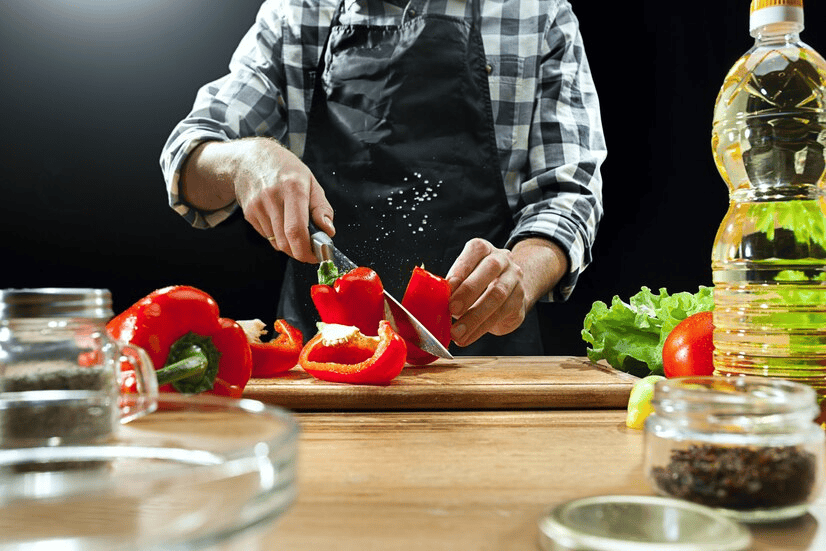
- Think about the key moments you want to capture during cooking, such as chopping vegetables, simmering sauces, or the final plated dish.
- Consider the angles and perspectives that will best showcase each step.
Use Natural Light
Whenever possible, take advantage of natural light from windows or doors. Position your cooking space close to natural light sources to prevent harsh shadows and achieve a gentle, flattering ambience.
Set Up Your Camera
- If using a smartphone, ensure the camera settings are adjusted for optimal quality. You can use manual settings or dedicated camera apps to have more control.
- If using a DSLR or mirrorless camera, choose an appropriate shooting mode (e.g., manual or aperture priority) and set your exposure settings. Adjust (ISO, aperture, and shutter speed) to match the lighting conditions.
Use a Tripod
A tripod helps stabilize your camera, reducing blur and allowing for longer exposures if necessary.
Compose Your Shots
- Pay attention to composition. Use the rule of thirds, leading lines, and framing to create visually appealing images.
- Experiment with angles, such as overhead shots, close-ups of ingredients, or action shots of stirring or pouring.
Capture the Process
- Take photos from the start of the cooking process, capturing the ingredients, preparation, and cooking steps.
- Show the progression of the dish, including any changes in color, texture, or appearance.
Focus and Depth of Field
- Ensure your main subject (e.g., a dish or a specific cooking action) is in sharp focus.
- Adjust your aperture settings to control the depth of field. A wide aperture (low f-number) can create a blurred background (bokeh), while a narrow aperture (high f-number) keeps more in focus.
Styling
Pay attention to food styling. Arrange ingredients and dishes attractively, using garnishes and props as needed.
Experiment and Review
- Don’t be afraid to take multiple shots of the same subject, experimenting with different settings and angles.
- Periodically review your images on your camera’s LCD screen to make adjustments as needed.
Post-Processing
Following the cooking process, utilize photo editing software to improve and refine your pictures, fine-tuning exposure, color balance, and sharpness.
Remember that practice makes perfect in cooking photography. Over time, you’ll develop your style and techniques to capture enticing and informative images of your culinary creations.
What is Good Cooking Photography?
Good cooking photography is about capturing food to make it look visually enticing, mouthwatering, and irresistible. It involves careful attention to detail, lighting, composition, and food styling to showcase the dish’s textures, colors, and flavors. A well-executed cooking photograph not only documents the culinary process but also tells a compelling visual story, evoking the senses and inviting viewers to savor the dish with their eyes. It should convey the cook’s passion, skill, and creativity while leaving the audience hungry for more. Good cooking photography enhances the culinary experience, making the food taste and look extraordinary.
Realities of Cooking Photography
Cooking photography presents a unique set of realities that photographers must contend with. It demands culinary and photographic skills, often involving meticulous planning and execution. Timing is critical, as the perfect shot may hinge on capturing a fleeting moment in the cooking process. Food styling is an art requiring careful arrangement of ingredients and dishes to make them visually appealing. While the result can be mouthwatering images, the process can be time-consuming, involving post-processing and occasionally leading to food waste. Competition in the field is fierce, requiring photographers to continuously hone their skills and develop a distinct style to stand out. Despite these challenges, the artistry of cooking photography offers immense satisfaction for those passionate about food and visual storytelling.
Cooking Photography Pro Tips
Once you’ve mastered the fundamentals, it’s time to get creative. Elevating your images with props and styling can take your photography to the next level.
Choose your plate wisely
Opt for round plates over square or rectangular ones, as they are easier to photograph without distortion, especially at eye level or from shallow angles. A salad-sized plate can make your food appear more prominent and avoid unwanted space. While patterns and vibrant colors can add character to plain foods, ensure they don’t overshadow the main subject.
Experiment with backgrounds
To diversify your photo settings, consider using wooden surfaces, stained or painted to your liking. Tablecloths, placemats, and stone slabs can also serve as alternative backgrounds to your kitchen table or countertop.
Thrift store finds
Explore second-hand stores for unique and affordable props. You can find a variety of cutlery and dish styles that can suit different cuisines. Rustic, vintage items are popular for their homely and timeless appeal, but clean and modern props can also work well, depending on your food presentation.
Keep your accessories clean
Ensure that your props are free from dirt or used items that may inadvertently appear in the background of your photos. Double-check your setup to avoid any distractions.
Add dimension with accessories
Incorporate napkins, utensils, glassware, and other placements to enhance your composition and make your images more engaging. Consider color coordination and use complementary colors to create visually pleasing combinations. However, don’t overwhelm the scene with too many accessories; remember that the food should remain the focal point.
Garnish your dishes
Even the most unattractive dishes can benefit from garnishes like herbs, condiments, and toppings. Consider which colors will enhance the dish, but ensure your garnishes complement the overall flavor profile. Avoid using ingredients that don’t belong, no matter how visually appealing they may be.
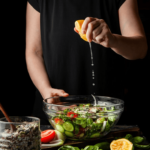
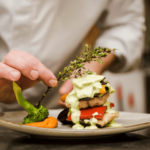
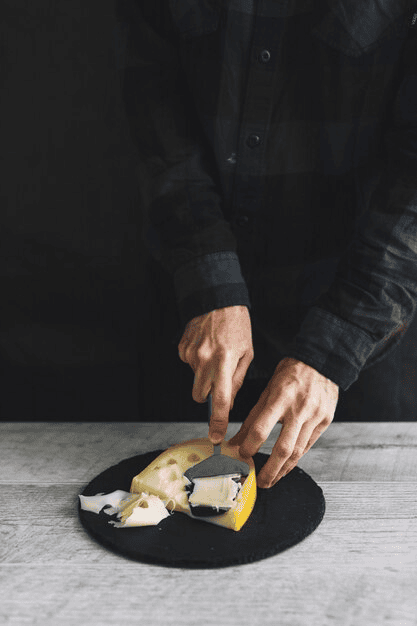
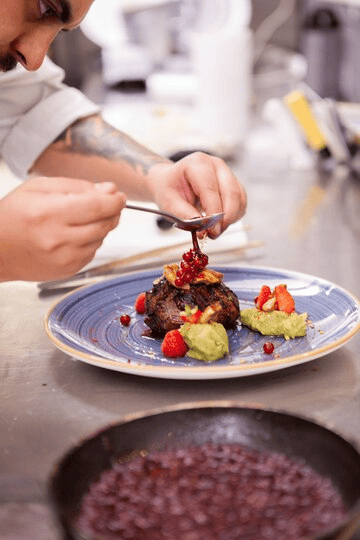
Interact with the food
If a static shot of a dish feels uninspiring, consider capturing moments of interaction, such as someone lifting a fork or spoonful. Ensure that their hands are clean and well-groomed if included in the frame. Taking a bite from a sandwich or scattering crumbs in the foreground can also add a sense of activity and make the food more appealing.
How to Get Started with Cooking Photography?
Getting started with cooking photography can be a rewarding journey. Here’s a step-by-step guide to help you begin:
Learn the Basics of Photography
Start by familiarizing yourself with photography fundamentals, including camera settings (aperture, shutter speed, ISO), composition, lighting, and focus.
Choose Your Camera and Lens
While a DSLR camera is ideal, you can start with a high-quality smartphone camera. Think about purchasing a prime lens with a generous aperture, such as a 50mm f/1.8, to gain greater control over depth of field.
Understand Lighting
Natural light is often preferred for food photography. Learn to use window light or diffusers to create soft, even illumination. Experiment with different times of day for varied lighting effects.
Food Styling
Study food styling techniques. Learn how to plate dishes attractively, use props effectively, and create visually appealing compositions. Pay attention to colors, textures, and shapes.
Plan Your Shots
Before you start cooking:
- Plan your photography.
- Visualize the final image, considering composition, angles, and props.
- Make a short list to guide your session.
Preparation
Prepare your ingredients and cooking space meticulously. Clean, uncluttered surfaces and well-organized ingredients are essential for good food photography.
Composition
Practice composition techniques like the rule of thirds, leading lines, and framing to create visually engaging images. Experiment with different angles and perspectives.
Camera Settings
Use manual or semi-manual camera modes to control exposure settings. Adjust your aperture to control the depth of field, allowing you to isolate the subject.
Tripod

Invest in a stable tripod to eliminate camera shake, especially in low-light conditions or for long exposure shots.
Shoot in RAW
If your camera allows, shoot in RAW format. It provides greater flexibility for post-processing.
Experiment
Be open to experimentation. Try different lighting setups, angles, and focal lengths to discover your style and what works best for your subjects.
Post-Processing
Learn post-processing techniques using Adobe Lightroom or Photoshop to enhance your images’ colors, contrast, and sharpness.
Establish a Portfolio
Craft a portfolio to display your finest work. Contemplate launching a food blog or Instagram account devoted to your food photography.
Network and Collaborate
Connect with chefs, food bloggers, or other food photographers. Collaborations can provide valuable experience and exposure.
Seek Feedback
Share your work with experienced photographers or join photography communities for constructive feedback and tips.
Stay Inspired
Continuously draw inspiration from cookbooks, food magazines, and other food photographers. Follow food-related accounts on social media for fresh ideas.
Practice Regularly
Like any skill, practice is essential. Keep experimenting, learning, and refining your techniques.
Starting with cooking photography may require patience and persistence. Still, with dedication and a passion for food and photography, you can develop your skills and create mouthwatering images that tell delicious stories.
How to Choose a Cooking Photographer?
Choosing a cooking photographer is like picking the right chef for your special meal. Here’s how to do it:
Look at Their Work
Check out their cooking photos. Do they make food look delicious?
Experience Matters
Find out if they’ve done this before. Experience can mean better pictures.
Talk to Them
Have a chat. See if they get what you want and if you feel comfortable with them.
Money Matters
Ask about the cost. Make sure it fits your budget.
Read Reviews
See what others say about them. Good reviews mean happy customers.
Check Availability
Make sure they’re free when you need them.
Get it in Writing
Put everything in a contract. This way, you both know what to expect.
Trust Your Gut
Go with the photographer who feels right for you.
What Are the Items Required for Cooking Photography?
Cooking photography requires essential items like a good camera with lenses (preferably with a wide aperture), a stable tripod, lighting equipment (natural or artificial), reflectors, backdrops, and props like plates and utensils for styling. Food styling tools such as tweezers and brushes and post-processing software for editing are crucial. Additionally, items like diffusers, remote shutter releases, clamps, cleaning supplies, and various kitchen tools aid in achieving appealing food compositions. Food, platters, and ingredients are, of course, essential components for creating mouthwatering images. Adapt your equipment and props to suit your cooking photography project’s specific style and purpose.
How to Take Perfect Cooking Photos with Your Smartphone?
To capture perfect cooking photos with your smartphone:
- Clean the camera lens.
- Use natural light by positioning your setup near a window, stabilize your phone with a tripod, and set focus and exposure by tapping on the screen.
- Shoot in landscape mode, experiment with angles, and frame your shot with complementary elements.
- Create depth in your photos, edit them using smartphone apps, and avoid using the phone’s flash.
- Capture action shots to showcase the cooking process, pay attention to food styling, and use garnishes for presentation.
- Practice, experiment, and share your mouth watering photos for feedback and improvement.

How to be Creative With Cooking Photography?
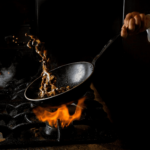
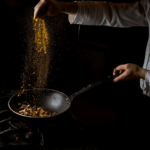
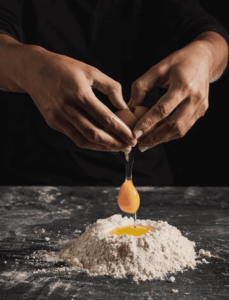
To infuse creativity into your cooking photography, think beyond the plate. Experiment with unusual angles and perspectives – shoot from below, get up close, or capture reflections. Play with lighting to create mood and drama; consider using side or backlighting to cast interesting shadows. Incorporate storytelling elements by showcasing the cooking process, ingredients, or the chef’s hands at work. Experiment with textures, colors, and props to add depth and character to your compositions. Don’t be afraid to break the rules, try new styles, and let your flair shine through – creativity in cooking photography is about capturing not just the food but also the emotions and stories it conveys.
What are 3 Cooking Photography Tips?
Utilize Natural Light
Position your setup near a window or well-lit area to make the most of soft, diffused natural light. Avoid harsh, direct sunlight, which can create harsh shadows and overexpose your subject. Light is one of the most critical elements in food photography, and natural light often produces the best results.
Focus on Composition
Pay attention to composition techniques like the rule of thirds, leading lines, and framing. Experiment with different angles and perspectives to find the most visually appealing way to present your dish. A thoughtfully composed photograph can make even the most basic meal appear enticing.
Food Styling Matters
Take time to style your food thoughtfully. Arrange ingredients and dishes attractively, use garnishes and props to enhance presentation, and consider the colors and textures of your food. Small details, like brushing olive oil for a glistening effect or adding a sprinkle of herbs, can significantly affect the final image’s appeal.
Simple Cooking Photography Ideas At Home
Creating compelling cooking photography at home is both fun and rewarding. Here are some simple ideas to get you started:
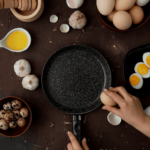
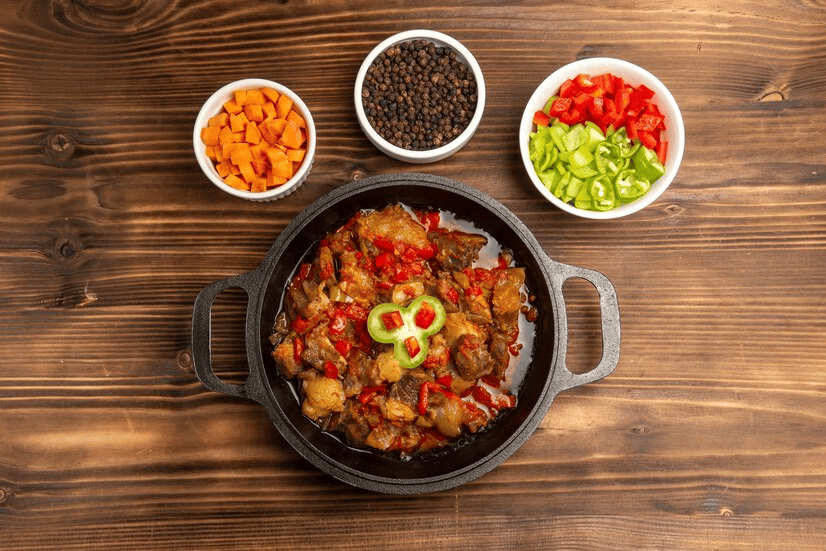
Overhead Shots
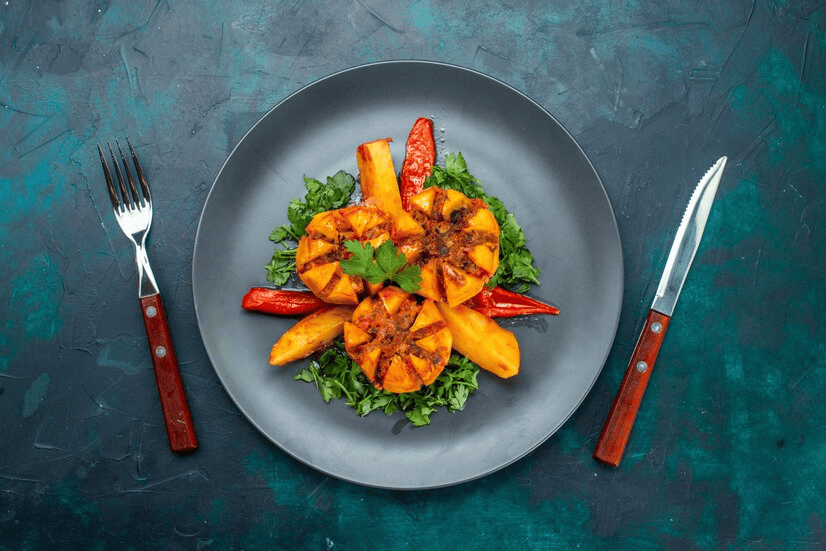
Place your dish on a clean, well-lit surface and capture it from above. This angle works well for flat-lay compositions and beautifully showcases the arrangement of your ingredients and dish.
Step-by-Step Collage
Document the cooking process with a series of photos arranged in a collage. Capture each step, from ingredient preparation to the final plated dish. This format is ideal for sharing recipes on blogs or social media.
Close-Up Details
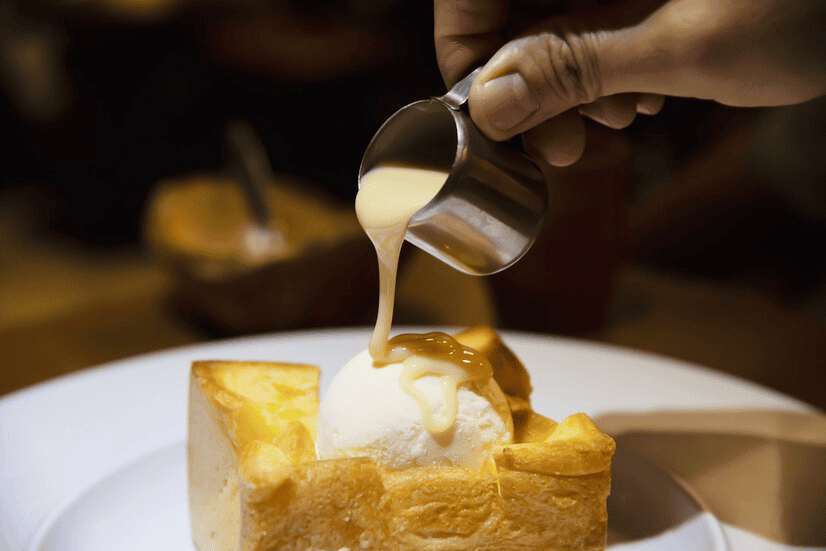
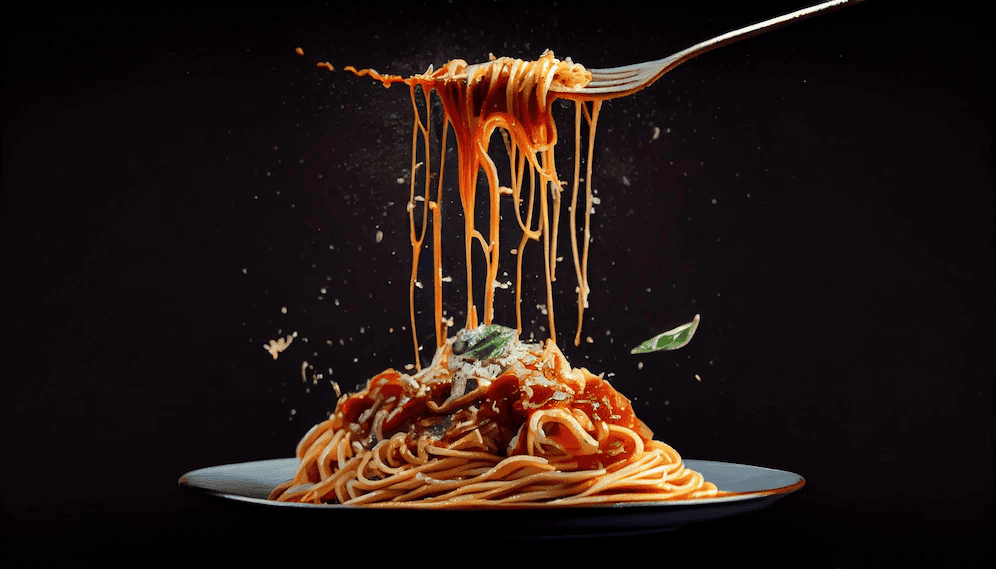
Focus on close-up shots to highlight the intricate details of your dish. Capture steam from freshly baked pie, sprinkle powdered sugar on a dessert, or pour a drizzle of sauce.
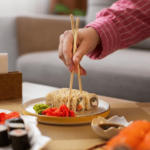
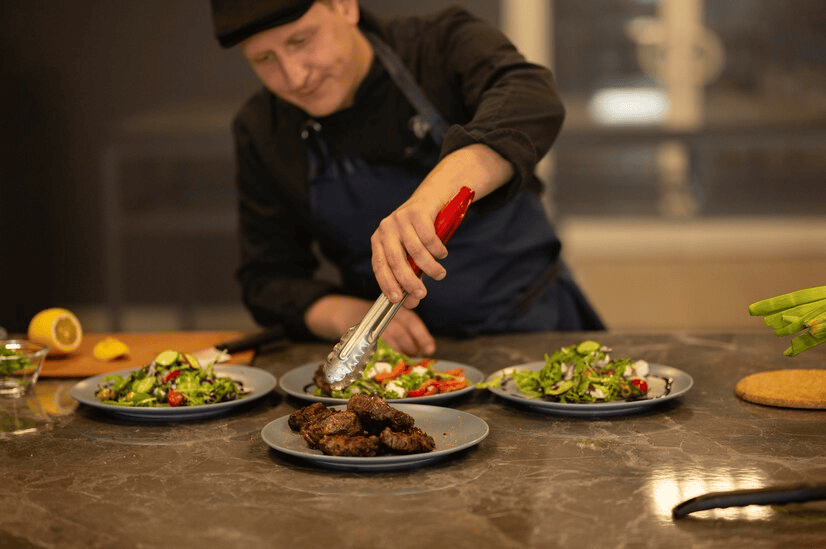
Candid Moments
Capture candid, behind-the-scenes shots of yourself or others cooking. These authentic moments can add a personal and relatable touch to your food photography.
Mood Lighting
Experiment with different types of lighting to create a specific mood. Soft, diffused natural light works well for a bright and fresh feel, while warmer, side-lit light can evoke a cozy atmosphere.
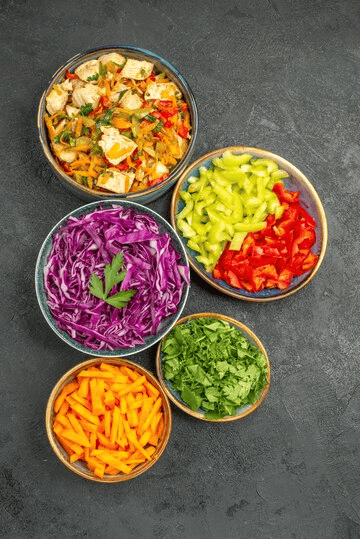
Incorporate Ingredients
Showcase the ingredients used in your dish. Place them in an artful arrangement around the final plated meal, giving viewers insight into the recipe’s components.
Table Setting
If your dish is part of a larger meal, photograph the entire table setting. Include dishes, utensils, glassware, and decorations to tell a complete dining story.
Use Props Creatively
Incorporate props like vintage utensils, textured fabrics, or fresh herbs to enhance the visual appeal of your shots. Props can add personality and context to your food photos.
Negative Space
Experiment with negative space to draw attention to your dish. Leaving empty areas in the frame can create a sense of balance and emphasize the main subject.
Color Coordination
Pay attention to color harmony in your compositions. Complement or contrast the colors of your dish with the background and props for visually striking photos.
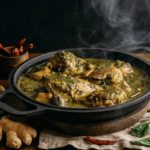
Freshness
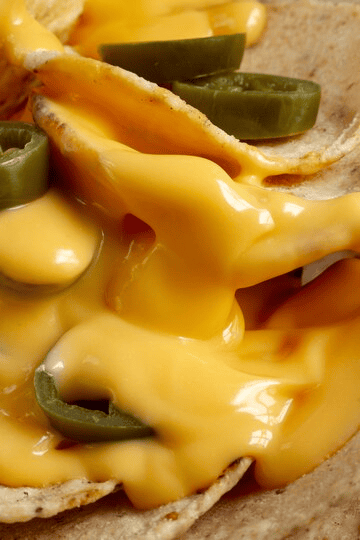
Capture your dish at its freshest moment. Show steam rising from a hot soup, the gooeyness of melted cheese, or the juiciness of a grilled steak.
Outdoor Dining
If possible, set up your dining area outdoors. Natural settings like a garden, patio, or picnic table can add a delightful backdrop to your food photos.
Remember that practice and experimentation are essential for enhancing your culinary photography skills. Experiment with various angles, lighting arrangements, and compositions to discover your distinctive style and capture delectable images in your kitchen.
Videos
6 Food Photography Tricks In 2 Minutes!!
10 FOOD Photography TIPS (From beginner to advanced) | Behind the scene
Take AMAZING food photos » 5 tips 📸