In photography, ISO, which stands for the International Organization for Standardization, pertains to a parameter that regulates how receptive your camera’s sensor is to light. A higher ISO number makes the sensor more sensitive, allowing you to capture images in low-light conditions, but it can introduce noise or graininess. Conversely, lower ISO settings are ideal for well-lit environments, providing cleaner images. ISO is one of the three essential elements, along with aperture and shutter speed, that determine exposure settings in photography, offering photographers flexibility in various lighting situations. Let’s demystify ISO in photography.

What is an ISO Setting in a Camera?
ISO in photography stands for International Organization for Standardization, but it’s commonly referred to as ISO. It’s a camera setting that determines the sensitivity of your camera’s image sensor to light. A higher ISO number makes the sensor more sensitive, allowing you to capture images in low-light conditions without a slow shutter speed or wide aperture. However, increasing the ISO too much can introduce noise or grain to your photos. Conversely, lower ISO configurations are optimal for brightly lit conditions, delivering cleaner and crisper images. Photographers frequently fine-tune ISO with aperture and shutter speed to attain the desired level of exposure for their pictures.
What does ISO mean for cameras?
ISO, in the context of cameras, stands for International Organization for Standardization, but it’s more commonly known simply as ISO. It denotes a camera adjustment that establishes how sensitive the camera’s image sensor is to light. A higher ISO setting makes the sensor more sensitive, allowing you to capture images in low-light conditions without needing a slower shutter speed or wider aperture. However, increasing the ISO too much can introduce noise or graininess to your photos. Conversely, lower ISO settings are used in well-lit situations to produce cleaner and sharper images. ISO is one of the three fundamental factors, alongside aperture and shutter speed, that photographers manipulate to govern the exposure and appearance of their photographs.
How does ISO affect a photo?
ISO affects a photo by controlling the sensitivity of your camera’s image sensor to light. Here’s how it impacts your photos:
Exposure
Higher ISO settings (e.g., ISO 800, 1600) make your camera’s sensor more light-sensitive, allowing you to capture properly exposed images in low-light situations. This is useful for indoor or nighttime photography when you need to avoid underexposure.
Noise and Grain
Increasing the ISO also increases the chance of introducing digital noise or graininess into your photos. This noise can degrade image quality, making it appear less sharp and detailed, especially in areas with low light or shadow.
Shutter Speed and Aperture
Adjusting the ISO is one way to achieve the correct exposure. When you increase the ISO, you can use a faster shutter speed or smaller aperture while maintaining the same exposure, which can be advantageous in specific shooting conditions.
Creative Control
ISO settings provide photographers with creative control over the look and style of their photos. Lower ISO settings (e.g., ISO 100 or 200) produce cleaner, smoother images suitable for well-lit scenes. In comparison, higher ISO settings can add a gritty or grainy texture, which may be desirable for certain artistic effects.
In summary, ISO affects exposure, noise, and the overall look of your photos. Selecting the appropriate ISO setting relies on factors such as lighting conditions, the preferred image quality, and the creative style you aim to achieve in your photography.
How to Use ISO in Photography?
Using ISO effectively in photography involves understanding how it impacts your images and when to adjust it based on the shooting conditions. Here’s how to use ISO in photography:
Assess Lighting Conditions
Start by evaluating the available light. Is it bright and well-lit, or is it dim and low-light? Your ISO setting will largely depend on this assessment.
Select a Base ISO
Most cameras have a base ISO, often ISO 100 or 200, which provides the cleanest and least noisy images. Use this as your starting point when shooting in well-lit conditions.
Use Low ISO in Good Light
In bright, well-lit situations, keep your ISO low (e.g., ISO 100 or 200) to achieve the best image quality with minimal noise. This suits landscapes, outdoor portraits, and studio photography with controlled lighting.
Increase ISO for Low-Light
When shooting in low-light conditions, increase the ISO to a level that allows you to maintain a fast enough shutter speed to avoid motion blur. Experiment with ISO settings between 400 and 1600 or higher as needed.
Consider Shutter Speed and Aperture
Remember that increasing ISO allows for faster shutter speeds and smaller apertures, which can be advantageous in freezing fast-moving subjects or increasing depth of field.
Monitor Noise
Be mindful of noise levels in your photos. As you increase ISO, you may introduce noise or grain. Check your camera’s high ISO noise reduction settings and consider post-processing techniques to reduce noise.
Bracketing
In challenging lighting situations, consider bracketing your shots. Take multiple shots at different ISO settings to capture the best possible exposure.
Creative Use
Don’t be afraid to use higher ISO settings intentionally for creative effects. Higher ISOs can add a gritty or vintage look to your photos, which can be desirable for certain subjects or artistic styles.
Auto ISO
Many cameras offer an Auto ISO mode. While it can be useful, be cautious, as it might select a higher ISO than necessary. Monitor the camera’s choices and override them when needed.
Review Images
After taking a shot, review it on your camera’s LCD screen to check for noise and exposure. Adjust ISO as needed and reshoot if necessary.
Why Use High ISO in Photography?
High ISO settings in photography are used primarily in low-light situations where there isn’t enough available light to achieve a well-exposed image with a lower ISO. By increasing the ISO, the camera’s sensor becomes more sensitive to light, allowing you to capture photos in challenging lighting conditions without the need for a slow shutter speed or wider aperture. This is the configuration where the camera’s image sensor reaches its peak sensitivity to light, typically resulting in images with minimal noise and the widest dynamic range. Therefore, photographers use high ISO when the benefits of capturing a shot in low light outweigh the potential drawbacks of noise.
Selecting the Right ISO
Selecting the right ISO in photography involves considering the lighting conditions and the desired outcome for your image. Here’s a step-by-step guide:
Start with Base ISO
Begin with the camera’s base ISO setting (usually ISO 100 or 200) for optimal image quality, especially in well-lit situations.
Assess Lighting
Evaluate the available light. If you’re shooting in bright sunlight or a well-lit studio, keeping the ISO low is usually best.
Low ISO for Still Subjects
When photographing stationary subjects, such as landscapes or portraits, use a low ISO setting for maximum image clarity and minimal noise.
Higher ISO for Low Light
In dimly lit environments or when capturing fast-moving subjects, consider raising the ISO to achieve proper exposure without sacrificing shutter speed.
Balancing Aperture and Shutter Speed
If you need a specific aperture (e.g., for depth of field) or shutter speed (e.g., for freezing motion), adjust the ISO accordingly to maintain proper exposure.
Beware of Noise
Be cautious with high ISO settings, as they can introduce noise or grain into your photos. Strike a balance between achieving proper exposure and managing noise.
Bracketing
In challenging lighting conditions, bracket your shots by taking multiple photos at different ISO settings. This ensures you have options for achieving the best exposure.
Creative Use
Consider intentionally using higher ISO settings for creative effects, such as adding grain or a gritty texture to your photos for artistic purposes.
Test and Review
After taking a shot, review it on your camera’s LCD screen to check for noise and exposure. Make adjustments to the ISO as needed and reshoot if necessary.
Use Auto ISO Wisely
If your camera offers Auto ISO, it can be a helpful tool, but keep an eye on the settings it chooses and override them when necessary to achieve your desired results.
Selecting the right ISO is a balancing act between achieving proper exposure, managing noise, and meeting your creative goals. It requires practice and an understanding of how ISO interacts with other camera settings, such as aperture and shutter speed, to achieve the best results for your photography.
What are the Common ISO Values?
In photography, there are common ISO values that photographers often use to achieve specific results. Here are some typical ISO settings and their general purposes:
ISO 100
This is often called the base ISO and is used in well-lit conditions when you want the highest image quality with minimal noise. It’s great for landscapes and studio photography with controlled lighting.
ISO 200
Similar to ISO 100, this setting suits bright lighting conditions and maintains good image quality. It’s a versatile choice for various photography situations.
ISO 400
ISO 400 is a flexible setting for various lighting conditions. It’s commonly used for general outdoor photography and situations where you need a slightly faster shutter speed.
ISO 800
This ISO setting is ideal for indoor photography and low-light conditions without introducing too much noise. It’s often chosen for portraits and events.
ISO 1600
ISO 1600 is considered a moderately high ISO setting. It’s used when you need to shoot in dim light but still want relatively clean images. It’s suitable for concerts and indoor sports.
ISO 3200
This is a higher ISO setting often used in challenging low-light situations. While it may introduce some noise, it’s a good choice for capturing action in poorly lit environments.
ISO 6400 and Beyond
ISO settings of 6400 and higher are considered very high. They are used when shooting in extremely low light or when you need fast shutter speeds. However, they can introduce noticeable noise, so that post-processing may be necessary.
Remember that the specific ISO values you choose will depend on your camera’s capabilities and the lighting conditions you encounter during your photography. The goal is to balance achieving proper exposure and managing noise to achieve the desired image quality.
What is Base ISO?
Base ISO is the lowest native ISO setting available on a digital camera. This setting represents the point where the camera’s image sensor achieves its highest sensitivity to light, typically resulting in images with minimal noise and the greatest dynamic range.
Base ISO is often set at ISO 100 or ISO 200 on many digital cameras, although it can vary depending on the camera’s make and model. Photographers often use the base ISO in well-lit conditions when they want to capture images with the best image quality and minimal noise.
While some cameras offer “extended” ISO settings below the base ISO (e.g., ISO 50), these settings are achieved through software manipulation and may not provide the same image quality benefits as the true base ISO. Therefore, the base ISO is the standard for achieving the best image quality in photography.
How to Change ISO on a camera?
To change the ISO on a camera, follow these steps:
Access the Menu
Turn on your camera and access the menu system. The location of the ISO setting may vary depending on your camera model.
Locate ISO Setting
In the camera menu, look for the ISO setting. It’s typically found in the shooting or exposure settings section.
Select ISO Value
Once you’ve located the ISO setting, select it. You’ll often see a list of ISO values, such as 100, 200, 400, etc. Use the camera’s directional buttons or touchscreen to highlight and select the desired ISO value.
Confirm and Exit
After selecting the ISO value, confirm your choice and exit the menu system. Your camera is now set to the chosen ISO setting.
Alternatively, many modern cameras have a dedicated ISO button or dial that allows for quick access to change the ISO without going into the menu. Consult your camera’s user manual for specific instructions on changing ISO settings for your particular camera model.
Importance of Camera ISO in Photography
The camera ISO setting is paramount in photography as it directly affects exposure and image quality. It determines the sensor’s sensitivity to light, allowing photographers to adapt to various lighting conditions. A lower ISO (e.g., ISO 100) is ideal for well-lit scenes, ensuring the best image quality with minimal noise. Conversely, a higher ISO (e.g., ISO 800 or higher) is crucial in low-light situations, enabling faster shutter speeds to freeze motion or capture subjects in challenging lighting. However, understanding how to balance ISO with aperture and shutter speed is essential to achieve optimal exposure while managing potential noise. The ability to control ISO allows photographers to capture stunning images in diverse scenarios.
What ISO Should You Use and When?
The ISO setting in photography depends on the lighting conditions and the effect you want to achieve. Here’s a general guideline:
Low ISO (e.g., ISO 100-400)
Use these settings in bright light conditions or when you want the best image quality with minimal noise. They are ideal for landscapes, studio photography, and situations where you can use slow shutter speeds or wide apertures.
Moderate ISO (e.g., ISO 400-800)
Opt for these settings in typical outdoor or well-lit indoor settings. They balance image quality and shutter speed, suitable for general photography.
High ISO (e.g., ISO 800-3200+)
Use higher ISO settings in low-light situations or when you need faster shutter speeds to freeze motion. These settings enable you to capture images in challenging lighting but may introduce some noise.
Creative ISO
Don’t hesitate to use higher ISO settings intentionally for creative purposes, such as adding grain for a vintage look or emphasizing texture and mood in low-light scenes.
Ultimately, the choice of ISO is a creative decision, and it should align with your vision for the shot and the specific conditions you’re photographing in. Balancing ISO with aperture and shutter speed is key to achieving the desired exposure and image quality.
Role of ISO in Noise and Light While Using a Camera
ISO plays a vital role in photography as it impacts both the level of noise in images and the amount of light exposure. Higher ISO settings make the camera sensor more sensitive to light, allowing for proper exposure in low-light conditions but potentially introducing noise or graininess to the image. Lower ISO settings reduce noise but may require more light for correct exposure. Photographers must strike a balance, choosing the appropriate ISO based on lighting conditions to achieve the desired image quality and manage noise effectively. This balance between ISO, aperture, and shutter speed is fundamental to capturing well-exposed, noise-free photographs in various lighting situations.
Camera ISO, Aperture, and Shutter Speed
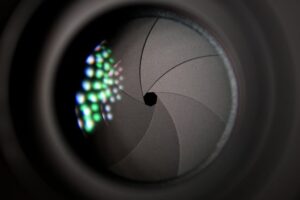
ISO, aperture, and shutter speed constitute the trio of essential elements in photography, collaborating to manage exposure and attain distinct creative results. ISO dictates the camera sensor’s light sensitivity, with higher settings suitable for low-light scenarios and lower settings ideal for well-illuminated conditions. Meanwhile, the aperture modulates light intake through the lens by altering the size of the lens opening, referred to as the aperture value or f-stop. A wide aperture (low f-number) lets in more light and creates a shallow depth of field, while a narrow aperture (high f-number) limits light and increases the depth of field. Shutter speed dictates when the camera’s sensor is exposed to light, affecting motion blur and freezing or capturing movement. Together, these settings enable photographers to achieve proper exposure while controlling depth of field and motion, allowing for creative control over their images. Adjusting one setting often necessitates compensating with the others to maintain the desired exposure and effect.
Videos
Camera Basics for Video: What is ISO?
What is ISO — Camera ISO and the Exposure Triangle Explained [Ep 2]
Understanding ISO and How to Use it | Adobe Photography Basics
What is the ISO Setting on your Camera?
How Camera ISO Works: Native, Dual & The Secrets of Noise
