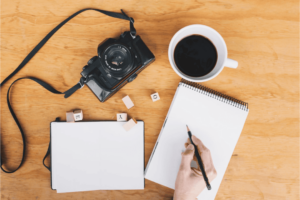
Long Exposure Photography is a photographic style that takes advantage of long exposures or slow shutter speeds. By doing so, we can blur moving elements such as cars, water, or clouds to create creative and unique-looking imagery.
When the shutter speed is languid to capture a sharp handheld image, it results in Long Exposure Photography. Shutter speed varies depending on the camera and focal length.
Long Exposure Photography is popular among various genres such as architecture, landscape photography, street, abstract- and culture photography. It is more common within some fields of photography, but the technique can be used in many ways.

What is shutter speed?
The shutter speed is the number of times the camera’s shutter is open. This duration is measured in seconds or fractions of seconds. Therefore, a greater denominator, such as 1/1000, denotes a faster shutter speed than a lower denominator such as 1/10. Conversely, a lower denominator or slower shutter speed lets more light reach the sensor.
The camera records everything that moves within a frame as long as the shutter is open, making the water look blurred, clouds stretch across the skies, and cars leave light trails.
Shutter Speed – Beginner’s Tutorial
How Shutter Speed Affects a Photo?
Shutter Speed is one of the most significant factors, along with Aperture and ISO, when it comes to photography. Shutter speed is fundamental to photography that affects the motion of the picture. Changing the brightness of your shot and producing dramatic effects by either freezing the action or blurring motion are two of the main functions of the shutter speed. While ISO maintains the image’s quality, the aperture helps create depth in photography by increasing the focal length. Below is an easy exercise that you can do anywhere to see how the shutter speed affects a photo and what happens when you lengthen the exposure time.
- Set the camera on a tripod, table, or some steady stand.
- Now, ask someone to walk across the frame, or you can use a delayed shutter and do it by yourself while setting the shutter speed to 1/1000.
- Repeat the process by changing the shutter speed to 1/500.
- Set the shutter speed setting to a lower range to get a sharp image such as 1/200, 1/20, or 1/5, and end with 1 second and repeat the procedure.
Unless the person sprinted through the room, there would be no difference in the first few images. However, once the shutter speed reaches 1/5th of a second, the picture begins looking different. The person walking across the room would be blurry for 1 second; some would even say it looks like a ghost!
Essential equipment for Long Exposure Photography
The essential equipment for photography has many opinions and tends to get quite heated. Of course, any camera can capture great images, but it’s vital to understand your equipment’s limitations.
Camera with manual functions
Long Exposure Photography can be achieved using digital cameras or the latest smartphones. The main requirement is to manually adjust the camera settings, such as ISO, aperture, and shutter speed. Cameras with Bulb or Time mode are extra helpful to achieve shutter speeds above 30 seconds. However, this is not a requirement.
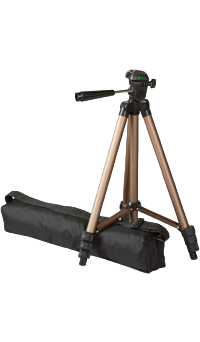
A sturdy tripod
A tripod is necessary for Long Exposure Photography. Some might use other objects to rest the camera on, but it’s a less flexible and unyielding solution. In addition, this technique requires slow shutter speeds, often stretching into seconds or even minutes. In these situations, it isn’t easy to take sharp images handheld. Invest in a somewhat solid tripod that will not break easily, mainly when used outdoors.
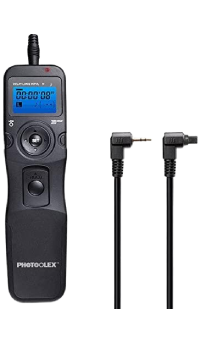
A remote shutter releases
A remote shutter release is applicable when you’re using Bulb Mode. Though it is not essential when photographing with exposure times under 30 seconds, it is always recommended to go for a remote shutter release or the delayed shutter function of your camera. This is an essential step to reduce unwanted camera vibrations.
There are two principal reasons why a remote shutter release is perfect for Long Exposure Photography:
- Remote shutter release prevents camera vibrations caused by pressing the camera’s shutter button
- Remote shutter release aids in achieving shutter speeds longer than 30 seconds by using Bulb Mode.
A simple remote shutter release with a timer and lockup possibility can benefit when working with long exposure times.
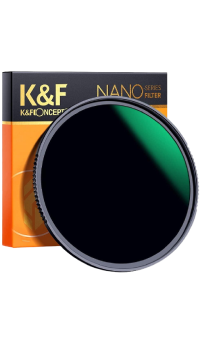
Neutral Density filters
Neutral Density filters, commonly known as ND filters, are darkened filters mounted to the lens to reduce the light reaching the shutter. If the filter is dark, a slower shutter speed is needed to capture a well-exposed image. These filters aren’t necessary while photographing in the dark as light reaches the sensor slowly at night. However, during the daytime, the filters are required for Long Exposure Photography. Therefore, many prefer using these filters during the Golden Hour. ND filters come in a few different shapes and forms, while the two most common are the screw-on and drop-in/square systems.
Lenses for Long Exposure photography
Long-exposure photography is a method that involves retaining the camera shutter open for an extended period. To get crisp photographs while using this approach, the shutter speed should be between 1/5000 and 1/40 of a second. For long-exposure photographs, use the camera’s light meter and adjust the shutter speed, aperture, and ISO to get an exposure value of zero.
Lenses guide:
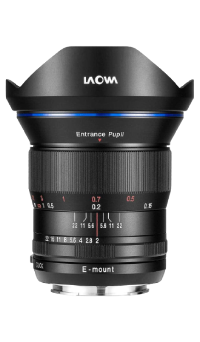
Venus Laowa 15mm f/2 FE Zero-D sports a superb optical design with 12 elements in nine groups and a 72mm filter thread for quick-attach screw-on filters.
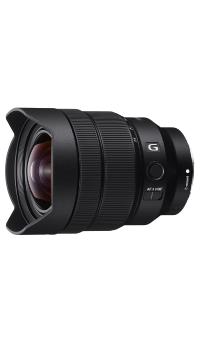
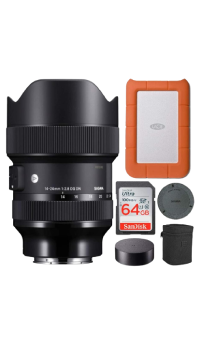
The Sony Alpha FE 12-24mm f/4 G zoom lens has a focal length range of 12 to 24mm. It features four aspherical elements that eliminate aberrations often associated with wide-angle lenses.
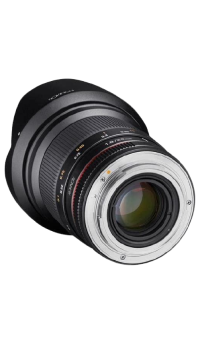
The Rokinon 20mm f/1.8 AS UMC lens is interchangeable with full-frame and APS-C DSLR cameras consisting of 13 elements arranged in 12 groups. The lens has an impressive aperture range of f/1.8 to f/23 with a minimum focusing distance of 0.66 feet.
Sigma 14-24mm f/2.8 DG DN also has manual focus, providing maximum artistic control while shooting.
Tamron’s 28-75mm F/2.8 Di III RXD lens has an innovative mirrorless framework that uses vivid pictures with soft, defocused blurring images when required.
Filter darkness and Long Exposure Photography
Neutral Density filters come in many degrees of darkness. The darkness level is expressed by terms such as 2 Stop, 6 Stop, and 10 Stop along with the Optical Density and the ND Factor.
These terms define the darkness level of the filter and the extended exposure time to achieve the same exposure you would get without a filter. For instance, a 10 Stop ND filter requires you to use a shutter speed of 10 stops, or 1,000 times, slower. That means an actual shutter speed of 1/60th second becomes 16,7 seconds.
A shutter speed of 5 seconds may be sufficient to blur the water, but it will not blur clouds.
A common mistake of beginners of Long Exposure Photography is purchasing only the brightest filters, such as a 1 or 2 Stop. Though these tend to be a little cheaper, they also don’t affect most scenarios. They are only helpful in the Blue Hour when it’s semi-dark.
6 and 10 Stop filters are generally used to reduce the shutter speed. There is a possibility to extend the shutter speed to several minutes when used during the Golden Hour. These darker filters are used in most of the images with silky water or stretched clouds.
Steps to Setting up and shooting Long Exposure Photography
The methods are the same regardless of the scene and genre of photography. Only the compositional approach is different.
Here are the eight steps to Long Exposure Photography to follow to get the best results.
Step-1 Make the composition
A strong composition is essential to create a compelling image. Though this is the case for photography in general, it’s more important while using a slow shutter speed. It is recommended that you approach the scene in the same way you would’ve usually done. First, ask yourself what the main subject of the image is. How can you make it stand out? You should then incorporate the sky or other moving elements into the frame to highlight this subject. Position the camera on a tripod and connect the remote shutter release when you find an impressive composition. Ensure that the tripod is appropriately set up and that it stands still while capturing the image. Scenes without clouds or moving elements do not benefit from long exposure. Again, this is because there are no elements that show the effect.
Step-2 Application of normal settings
The second step in setting up a long exposure image is to use the ‘normal’ settings. You can prefer to change the settings manually or use one of the camera’s Semi-Automatic Modes. The most important thing to note is the required shutter speed to get a well-exposed shot. We recommend setting the shutter speed manually. Ensure to set the ISO to a low value such as 64 or 100. The aperture setting depends on the scenery, but the best aperture is between f/7.1 and f/13. These two settings should continue to be the same throughout the whole process.
Step-3 Taking a test shot
After applying the settings, you need to take a test shot. First, look at the image preview and ensure that the exposure is good. Then, zoom in on the preview to ensure that the focus is sharp.
If you are satisfied with the image, note the exact shutter speed you used for this image. Noting it down is important as you will need this information in a few steps.
Step-4 Switching to manual focus and settings
Begin by switching to full Manual Mode if you haven’t manually set the ISO, aperture, and shutter speed. It would help if you stayed in this mode for the rest of the process.
Now switch to manual focus. The image should already be in focus because of the test shot.
The dark ND filters will make the Live View or viewfinder completely black. In addition, the camera struggles to set the focus when working with these dark filters as it has no reference points. That will lead to out-of-focus images. This will be difficult to manage while dealing with shutter speeds of several minutes.
Step-5 Mounting the filter in front of the lens
Most of the filters are placed in front of the lens. So, be careful while screwing the filter on or slide it into the filter holder so as not to accidentally twist the focus ring or move the camera. Also, ensure that the filter is tightened correctly without any gap between it and the lens. Small gaps might lead to light leaks which rarely occur with screw-in filters but often with incorrectly mounted square filters.
Step-6 Calculating the new shutter speed
You may not see much when looking through the viewfinder after mounting a 10-Stop Neutral Density filter that also applies to the camera. So, if you attempt to take a picture now, it will most likely be pure black. So, it would be best if you calculated the new shutter speed. There are two methods of calculating the new shutter speed.
Method 1: Using a Long Exposure Photography app
One of the two methods of calculating the new shutter speed is using a Long Exposure Photography app. Many free apps, including the Long Exposure Calculator, automatically calculate the new shutter speed. You need to insert the actual shutter speed and the ND filter you’re using. This is why it is essential to note down the shutter speed you used in the test image. Some long exposure apps have a built-in timer that can keep track of how long the shutter has been open. The built-in timer would be helpful while using Bulb Mode and shutter speeds of more than 30 seconds.
Method 2: Calculating the shutter speed manually
Calculating the appropriate shutter speeds will help you learn which shutter speed to use based on the outside brightness.
First, you need to know the darkness level of your filter. Here are some examples:
- ND0.3 or 1 stop = 2x shutter speed
- ND0.6 or 2 stops = 4x shutter speed
- ND0.9 or 3 stops = 8x shutter speed
- ND1.8 or 6 stops = 64x shutter speed
- ND3.0 or 10 stops = 1000x shutter speed
Now you know that a 10 Stop filter lets through 1,000 times less light based on the information above. This means that the exposure time needs to be lengthened by 1,000 times to allow the same quantity of light to reach the sensor. So now, an actual shutter speed of 1/125th second should be 8 seconds, and a 1/30th second shutter speed should be 32 seconds.
Step-7 Applying the new shutter speed
After calculating the new shutter speed, it is time to adjust the camera settings. If the calculated shutter speed is less than 30 seconds, you can change it usually. However, suppose the calculated shutter speed is longer than 30 seconds. In that case, you must enter Bulb or Time Mode, which might vary depending on the camera. If the shutter speed is longer than 30 seconds, you should use the remote shutter release. Some cameras allow you to tap once to start capturing an image and once more to end the exposure. Hold the shutter button for the exposure time manually. For such situations, a remote shutter release with a lockup mode is preferable.
Step-8 Taking the shot and making adjustments
Once the exposure is done, look at the image preview. Now you have to assess whether the exposure seems correct or not. For example, some filters are darker than advertised and might require up to one extra stop in shutter speed. In such cases, adjust the shutter speed and take another shot.
Complete Guide to Long Exposure Photography
Long Exposure Photography Types
There’s a wide variety of possibilities, but long exposures generally fall into the following seven categories.
- Astrophotography
- Architecture
- Indoor Long Exposures
- Light Painting
- Light Trails from Cars
- Other Sources of Light
- Water
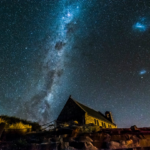
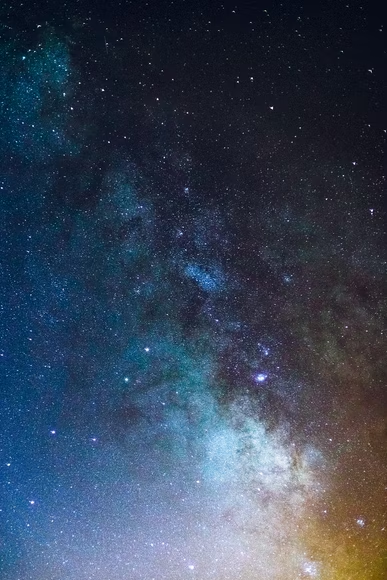
Astrophotography
One of the excellent ways to click a starry night sky is through long exposure. With a long exposure, the stars become bright and clear instead of hardly noticeable. So, while astrophotography might look complicated, it is so stunning and pretty simple. SLR Lounge provides helpful tips for long-exposure photos in a photography course exclusively designed for photographing the night sky.
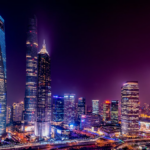
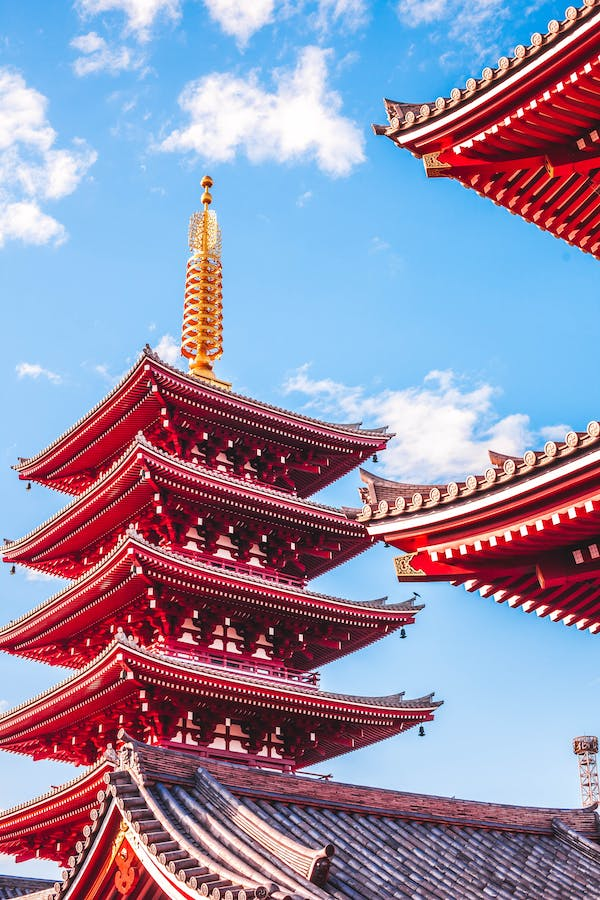
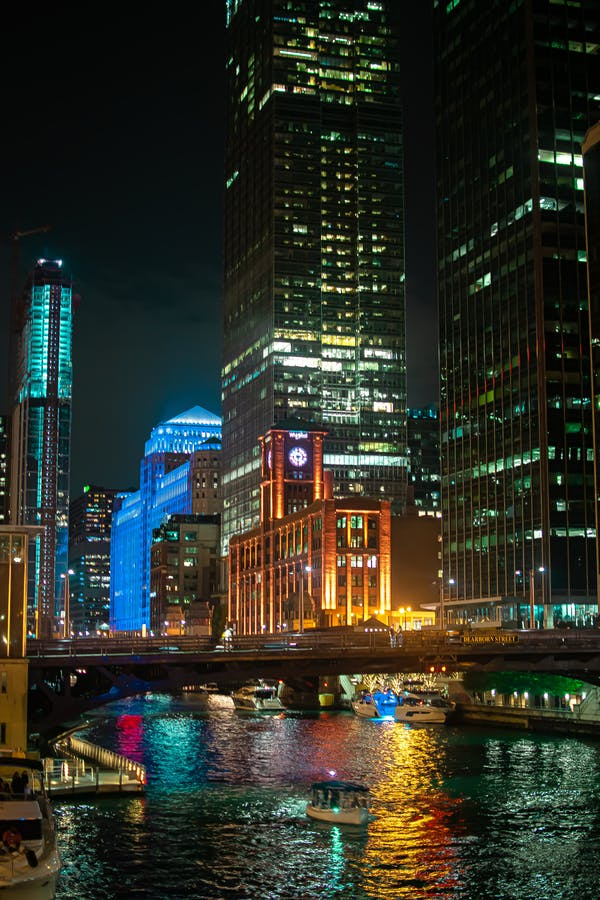
Architecture
Most of the long-exposure subjects are limited to day or night. For instance, a beach can be an excellent subject during the day, but it can disappear from view in darkness. Similarly, when the sun rises, a beautiful night sky will disappear. Buildings are an exception to this rule. They can be equally stunning during the day and night as long as the building is illuminated at night. Therefore, you can photograph a building whenever you want.
When photographing a building during the day, remember to include something moving in your picture. In most cases, this movement will either be clouds or people. When it comes to clouds, your main challenge is to watch and wait for the right weather. It would be best to balance clouds and blue sky, so there will be more contrast and drama.
Instead, you can also try to include people in your images. Though this will give you more flexibility with the weather, you still need to plan your shot carefully. For example, you will get more enjoyable photos during rush hour than in the early morning, while fewer people are out.
Indoor Long Exposures
Most long exposures are better with movements except for indoor long exposures. You don’t need any activity with long exposures indoors as you are not trying to capture the passing of time. You are trying to solve the issue of poor lighting instead.
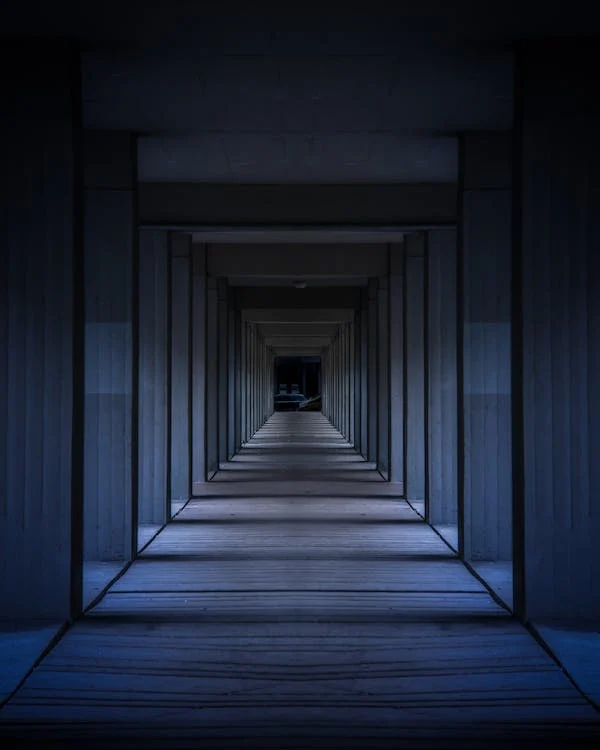
There are two basic options to take a regular shot in a poorly lit building. You can either use a higher ISO for a sharp image with more noise or a lower ISO for a blurry picture with less noise.
If you need a sharp, noise-free photo, you should take a long exposure. Light is magnified in a long exposure, and you can use a low ISO without any blur, but you should be using a tripod and shooting a still subject. This technique can capture the eerie atmosphere of an old theater or the gorgeous stained glass in a cathedral.
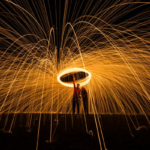
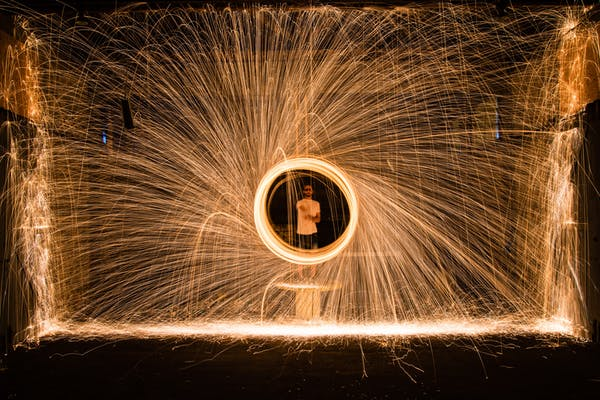
Light Painting
To take impressive long exposures at night, all you need is a source of light for the long exposure. A flashlight, sparkler, or LED light will work, and you might need someone to help with light painting.
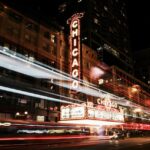
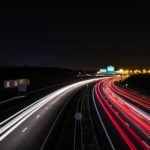
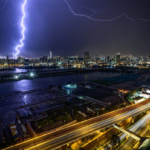
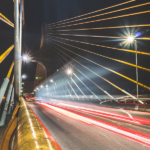
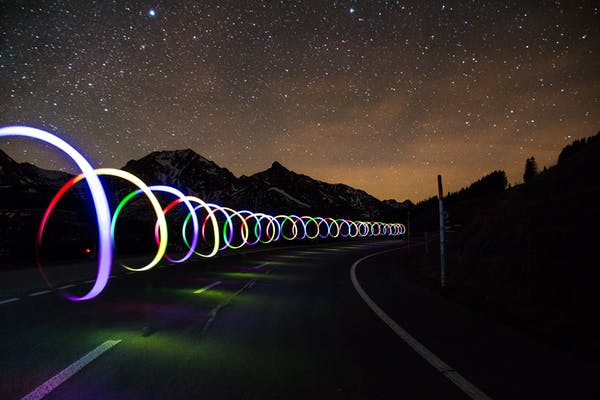
Light Trails
The main challenge in light trails is getting to a perfect location for photographs. There is no ideal type of road for light trails. Various places, from bridges to curving country roads, can be attractive. However, you want to find something of interest. This point of interest could be in the background, such as a remarkable building or the traffic. Big highways, roundabouts, and unique intersections can lead to exciting light trails.
Other Sources of Light
Cars and stars are the most common subjects for nighttime long exposures. However, countless other light sources are available for photographs, such as tunnels, lighting, traffic lights, airplanes, and telephone booths. It is possible to find a unique light source for long exposure no matter where you live.
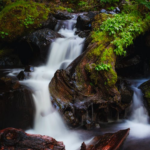
Water
Waterfalls, fountains, oceans, and rivers are traditional subjects for long exposures. Flowing water is a common choice as it is so pretty and predictable. Unlike many other moving subjects, such as clouds, you can rely on the water as it looks more or less the same every day and is predictable. Hence planning the shot is much easier.
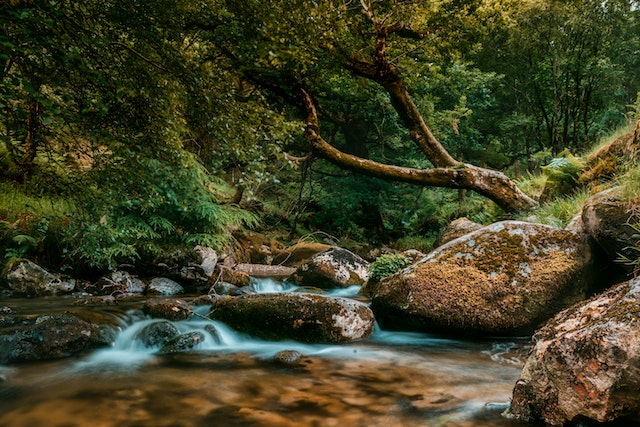
However, the fame of water long exposures means that your shot should stand out from the rest. So, you need to think creatively and try striking angles by positioning your camera differently. You can also enter the water and fix your tripod in a shallow area.
Long Exposure Photography Tips
Frequently Asked Questions
When should I capture a long-exposure photograph?
You can go for long-exposure photography at any time with the right equipment. However, starting with long exposure photography in the very early morning or the very late evening is recommended. During this time, the little light will provide impressively long exposures.
Can I take long-exposure images in daylight?
Yes, you can take long exposure images in daylight, but you’ll need an ND filter. Without an ND filter, your long-exposure images will be too bright.
Why are my long-exposure images white?
If you have white long exposure photos, then you have overexposed your images. To compensate for this issue, you have to increase the shutter speed, narrow the aperture, or drop the ISO.
What is long exposure in photography?
Long exposure refers to a technique in which the shutter is open for an unusually long period. Therefore, instead of capturing an image in a split second, you trigger the shutter button and often wait for minutes or even hours until the exposure is finished!
Can I take long-exposure photos on iPhones?
Yes, you can capture long exposures with an iPhone. Still, they are not equipped with manual controls like a traditional DSLR camera. Instead, specific workarounds in your iPhone allow you to simulate long-exposure effects like DSLR cameras. However, they are not the same as the iPhone camera cannot keep its shutter open for long periods to capture a photo. Instead, long exposures are simulated by using several images of the same scene and joining them together to create striking long-exposure photos.
How to capture long-exposure photographs on iPhone?
Method-1 Click a Live Photo and change it to long exposure
The Live Photo feature captures a video of 1.5 seconds automatically before and after you touch the shutter button. This creates a 3-second video that you can use to create a long exposure shot. You can either take live photos purposefully or use the one you have already taken to make a long-exposure photograph.
Steps to Follow
Step 1 Open the iPhone Camera and turn on Live Photos by clicking the Live Photos icon on the top of the screen. A pop-up text will appear on the top to alert that Live Photos is on or off.
Step 2 For best results, fix your iPhone to a tripod. Now, frame a shot with at least one moving component in it.
Step 3 Click the shutter button to capture a Live Photo.
Step 4 Now open your live photo from the Photos app.
Step 5 Swipe up to open Effects.
Step 6 Different effects will appear, under which, click on Long Exposure.
Step 7 The moving component in your Live Photo will appear as a blurred long exposure image now.
Method – 2 Using a Long Exposure App
You can use various apps, including Slow Shutter Cam, to achieve more flexibility than 3-second Live Photos.
Steps to take a long exposure photograph using Slow Shutter Cam on iPhone
Step 1 Open the Slow Shutter Cam app on your iPhone and allow necessary permissions to access your camera and photos.
Step 2 Open the app’s settings by clicking the Settings icon. You can choose the desired Capture mode as Motion Blur, Light Trail, or Low Light, and set the Light Sensitivity and Shutter Speed to suit your shooting conditions.
Step 3 Position your iPhone on a tripod and fix your shot with at least one moving component.
Step 4 Reduce camera shake by tapping the menu on the bottom left corner and choose Self-Timer by selecting your wanted shutter delay before capturing a photo.
Step 5 Now click on Done.
Step 6 Next, hit the shutter and wait for it to complete the process.
Step 7 If you want to clear the image Click, the Retry option. To make changes choose Edit, and select the Save option to save the photo to your library.
Method – 3 Using a Digitally Connected Camera
You can use a compact camera that connects to your iPhone and allows manual controls such as shutter speed. For instance, DxO ONE is a 20.2 MP digital camera with an f/1.8 prime lens, full HD video, and can shoot long exposures of up to 30 seconds.
Steps to use the DXO ONE to capture striking long exposure shots on iPhone
Step 1 Connect the DxO ONE camera to your iPhone’s lightning port and download the DxO ONE app.
Step 2 Allow necessary permissions to access your camera and photos.
Step 3 Once you get the capture screen on your iPhone, click the Capture Mode icon in the lower right corner, setting Auto naturally.
Step 4 Set to shutter priority mode and select the shutter speed.
Step 5 Set the shutter speed between 1/10″ and 30″ depending on your goal.
Step 6 Click the shutter button and use a remote trigger, or the volume buttons on the earbuds to capture a long exposure shot.
Long Exposure Photography iPhone
Conclusion
Long Exposure Photography is all about experimenting. You can apply it to so many genres of photography, and your creativity only limits you. Long Exposure Photography is an excellent way of capturing exciting and unique images. However, it requires more planning than ‘regular’ photography, and mistakes may become even more visible.