Pan shots, sometimes referred to as panning, are a basic yet extremely effective camera technique in which you move the camera horizontally from a fixed point to capture a panorama. To create a pan shot, you change turn the camera to the left of right without altering its position. There’s no such thing as panning up or down, which is referred to as a tilt, or in or out, which can be done with shots like a dolly shot or by zooming. Because of panning’s ability to be used for a wide range of situations and scenarios, it’s an important move for any aspiring photographer or cinematographer to master.
Uses for the Pan Shot in Film
Unlike in photography where pan shots are only used to communicate action or movement, there are many reasons that cinematographers decide to use a pan shot for certain scenes. Here’s a closer look at panning and its many uses:
Pan shots are often used to:
- Reveal the setting: You can pan to give an audience a better idea of the scene’s setting. This is especially effective if you’re hoping to set a specific tone or explore unusual surroundings.
- Shift point of view: Panning can be used to switch from one subject’s view to another’s.
- Transition between scenes: Instead of simply cutting to the next scene, you can use panning to transition. This is often used to indicate a jump through time and/or space. For example, a pan could be used to transport the audience to a past or future event, another location, or even into an imagined scenario.
- Reset a scene and its actors: Pan shots are sometimes used to change around a scene’s orientation. This technique is particularly helpful if you want to simulate the existence of a doppelganger, twin, or clone. To accomplish this, you’d quickly pan away from your actor in their original position and then land back on them after you’ve repositioned them.
- Show speed or action: Just like with photography, panning is a great way to communicate movement. That’s why filmmakers often use this technique in action sequences or to give a static scene some energy. You can pan to follow a character or object (like debris or a prop) that zooms past the screen or even to give the impression that something is moving way faster than it actually is.
- Interact with characters and their surroundings: You can use pan shots during a back-and-forth interaction to create tension or, more commonly, humor. Filmmakers frequently use this technique during comedic conversations or to show an actor’s reaction to something they have seen or heard off-screen.
Types of Pan Shots in Film
Depending on the scene and your needs, you can choose between a few different types of pan shots:
- Aerial pan shots: Filmmakers often attach cameras to drones and fly them over cityscapes, landscapes, or other large areas. While attached to the drone, the operator can pan the camera left or right to capture the shot.
- Whip pans: Often referred to as a whip shot or a swish pan, a whip pan is when you pan so quickly that it results in blurred imagery. As a result, it can leave the audience feeling temporarily disoriented. To create a whip shot, you can use a handheld, gimbal, dolly, or a tripod.
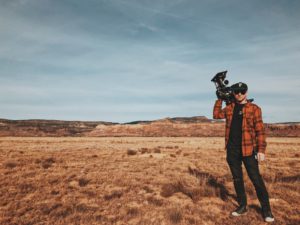
How to Create a Pan Shot in Photography
Creating a panning photo takes a bit more practice and a lot of patience. Here are the basic steps you can follow to try your hand at panning:
- Select a slower shutter speed. There are a few variables, like the speed of your subject and the lighting, that can affect the shutter speed you need to use. The best way to determine the ideal speed is to start at 1/30 second and gradually make it slower. Just be aware that a slower shutter speed could end up adding camera shake to your image if you’re not using a tripod.
- Find an unobstructed position. You need to find a place to set up where you have a clear view of the subject with little to no threat of someone or something blocking your shot. Setting up parallel to your subject’s path can make focusing much easier. It’s also wise to find a plain background that is free of colors and shapes that could prove distracting, even with the image’s motion blur.
- Pre-focus the camera on the spot you intend to release the shutter. If your camera has a reliable and responsive shutter speed, you can also rely on its automatic focus tracking.
- Track the subject as it approaches. In order to get a smooth motion blur while tracking, it’s a good idea to use a stabilizing device. Tripods and monopods that have a swiveling head can provide extra support for you and your camera, allowing you to remain steady and reduce camera shake.
- Release the shutter gently to minimize shake. Even after you hear the shutter and the shot is complete, continue panning with the subject to ensure a smooth motion blur from start to finish.
How to Create a Pan Shot in Film
Creating a pan shot as a filmmaker can be a bit easier to master. That isn’t to say that it doesn’t take practice though. Follow these steps to start panning:
- Mount your camera to a tripod. It is possible to pan with a handheld camera, but using a tripod offers more stability for your shot. If you’re using a handheld, hold the camera close to your body for the best results.
- Choose a beginning and ending frame. These frames serve as your pan shot’s bookends, so choose them wisely. When you’re first starting out, practicing with still frames can be helpful.
- Swivel the camera. Using the tripod’s handle, also known as a pan bar or a pan arm, move the camera from one side to another. Make sure that the tripod works without sticking or jerking and that you maintain a consistent movement and speed throughout the pan.
- Practice the pan. Before you begin filming, rehearse the movements a few times to make sure there is nothing blocking or shaking your shot. This is especially useful if you’re filming with actors, as it gives everyone a chance to check their positioning and run through the shot.
- Get several takes. Unexpected interruptions happen, some of which you may not notice immediately while filming. Make sure to get a few safety takes before wrapping up.
Examples of Pan Shots in Film
Now that you know what a pan shot looks like, you’ll start noticing its prevalence in film and television. A few examples of panning used in various situations are:
- “Kill Bill” and the whip pan: Quentin Tarantino loves using a good swish pan to show action, but you can also catch him using this technique to add a bit of drama and humor to a scene. In “Kill Bill: Volume 1,” you see this used when the Bride, Uma Thurman’s character, throws a knife at Vernita Green.
- “The Grand Budapest Hotel” and panning: Like Tarantino, Wes Anderson frequently uses pan shots to explore a setting and make things seem just a little more ridiculous. You can see this technique used quite often in his film, “The Grand Budapest Hotel.”
Panning is a simple technique that you can use to add depth and context to a story. It’s an important and extremely versatile tool for any filmmaker’s repertoire, which is why it’s one of the first moves taught in many film production classes. At Nashville Film School, we prefer teaching and training by doing, meaning you can learn about techniques like panning from real-life practice.