Lighting is the foundation of successful portrait photography, be it a corporate headshot or a character study. It’s key to flattering (or emphasizing) a person’s features, expressing your creative intent, and producing images that your clients will adore.
The key to exceptional portrait photography is understanding portrait lighting. In this article, we will help you to plan your portrait studio lighting. When creating a flattering portrait, the important factors are lighting ratios, lighting patterns, angles of view, and facial positions.

Here are a few lighting setups and how to use light and shadow on a subject’s face to create different looks. Get started with this portrait photography overview for folks who are brand new to photography. Then practice the below portrait lighting positions.
These lighting positions and explanations are designed for beginners and are great reminders for advanced photographers. In addition, all of these positions (except for a brief demonstration of lighting ratios at the end) use one light only (and sometimes a reflector), making these very achievable with minimal gear.
10 Best Portrait Lighting Setups You Can Pick
1. Butterfly Lighting
Butterfly lighting, also known as Paramount lighting, is named after the butterfly-shaped shadow created below the nose by placing the primary light source above, right behind the camera, and pointed down onto the face. It is also placed directly in front of the model at the center rather than right or left.
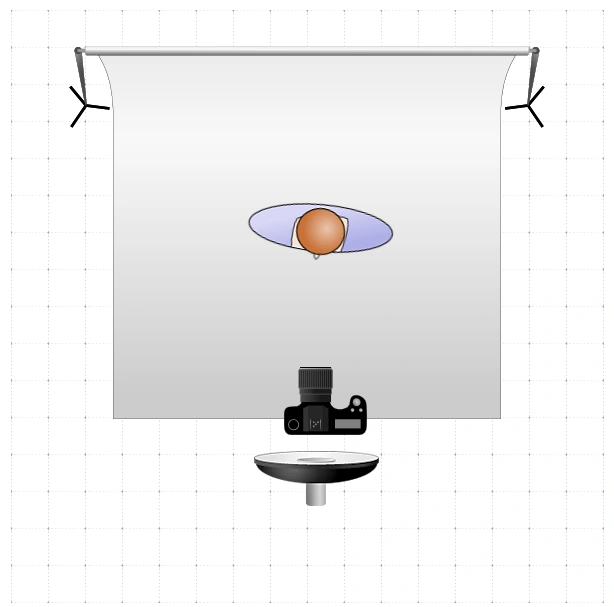
Image Source:Camerapro.com
Butterfly lighting generates a shadow under the chin, nose, and cheeks. When the subject is inclined at an angle, it can create more dramatic shadows beneath the cheekbones. The higher you position the light above the subject and behind you, the longer the shadows will get below the nose and chin. It’s flattering for most faces.
An angle of about 25-45 degrees above the face is a good starting point, though you’ll adjust based on the subject’s face shape.
2. Loop Lighting
Loop lighting is formed by placing your light slightly above the subject’s eye level and 45º off-axis (give or take), which shifts the nose shadow to one side of the face. So instead of a butterfly-ish shadow, you’ll observe a small loop.
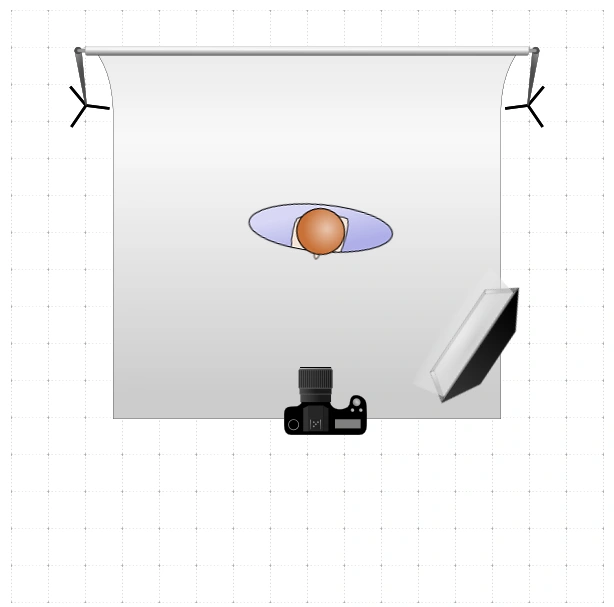
Image Source: Camerapro.com
Sometimes, loop lighting has a lengthening effect on the face. It’s flattering on most people, is used for headshots, and can be set up on either side. A shadow will appear on the opposite side of where the light is positioned. The shadow size depends on the position of the light and how much the nose is blocking that light. The nose tip casts a loop-shaped shadow. You will also notice a shadow appearing on the cheek opposite the light. Loop lighting behaves much like butterfly lighting, just further to the side.
3. Rembrandt Lighting
Rembrandt’s lighting is similar to loop lighting, named after the Dutch painter who used this style in his work. In Rembrandt’s lighting, the shadow loop of the nose is long enough to connect with the shadow on the cheek. By this, a triangle of light gets trapped on the cheek.
One-light Rembrandt lighting setup
Image Source: Camerapro.com
Rembrandt lighting with fill
To get this, begin with loop lighting but then continue to place your light up and to the side till the nose shadow and cheek shadows unite. This lighting style is moody, edgy, and artistic. Next, fill it with a reflector for a softer look.
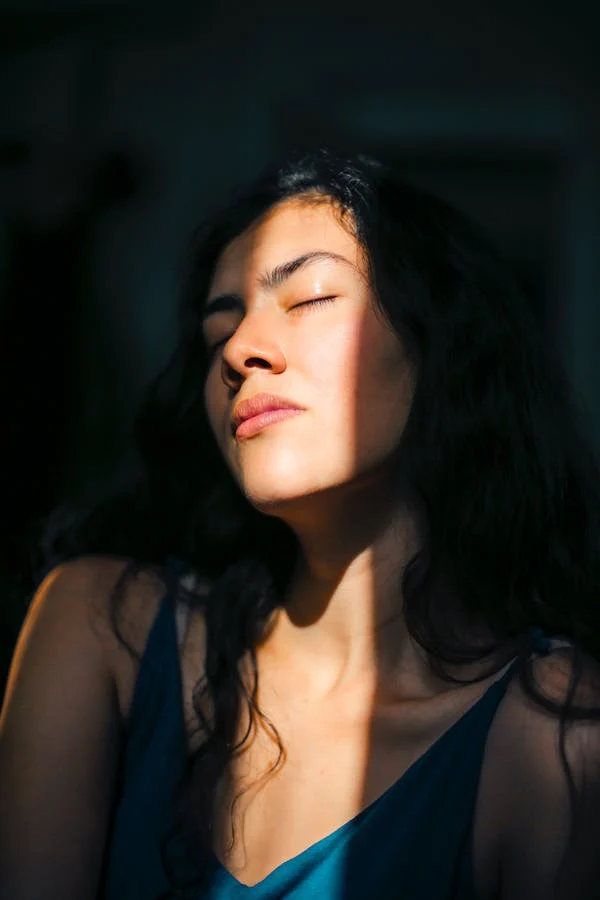
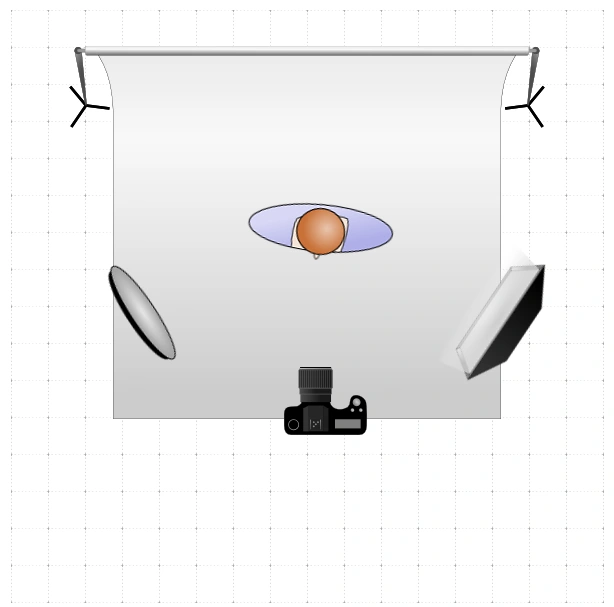
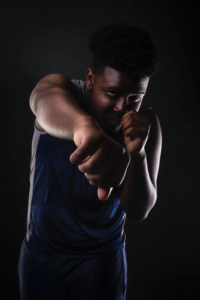
4. Split lighting
Split lighting, also known as side lighting, is a form of lighting where half of the subject’s face is lit while the remaining half is left in shadow. It creates a dramatically unique feel and is not as common as other lighting positions.
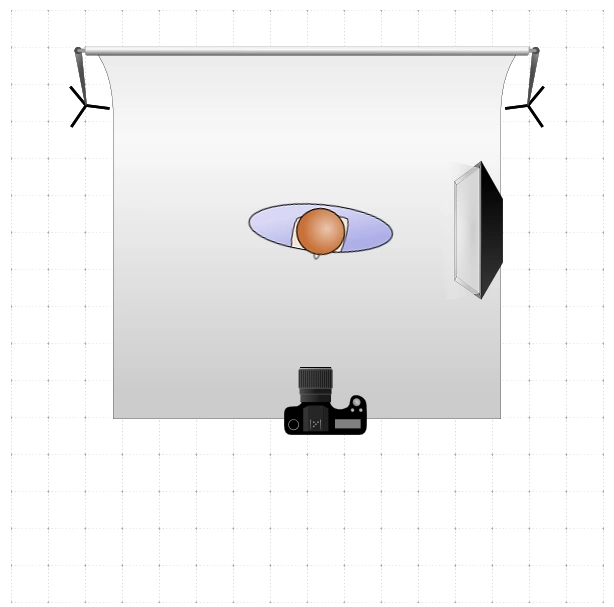
Image Source: Camerapro.com
Position your primary light to the side of your subject at a 90º angle. You can neglect the far side completely in shadow or use a bounce/fill light to show more detail.

Even if you don’t need much detail to show on the remaining/opposite side of the face, try using fill to create catchlights in the eyes. Keep in mind, this type of lighting will highlight the texture of your subject’s face. Split lighting is good for very moody portraits and is stylish but not flattering always.
5. Profile Lighting
Profile lighting or rim lighting is sometimes used in sports portraiture because it provides a heroic look.
There are two typical applications of profile lighting. For the first one, place your light behind your subject to create an edge of light around your subject, providing them definition and separation from the background. As a result, your subject will be mostly underexposed. This process requires more than one light source if you don’t just need an outline.
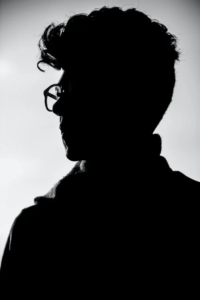
For the second one, position your subject at 90º so that you only see their profile. Place the light source in front of their face, at a reasonable distance, and just above eye level to start. You can even place the light just very slightly behind the side of the face away from the camera. Again, the idea is to light only the edge of their profile.
6. Broad Lighting
Broad lighting is often combined with one of the lighting patterns above to solve specific lighting problems.
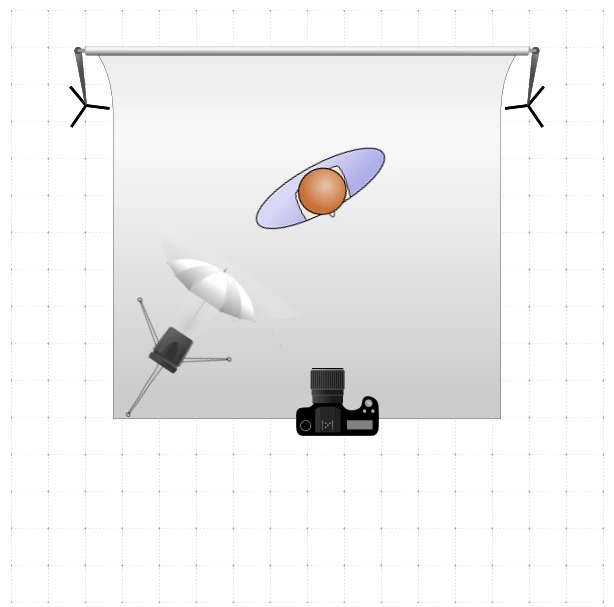
Image Source: Camerapro.com
Place the subject so that the part of their face receiving the most amount of light is also closest to the camera. This means your subject needs to be resting at a slight angle from you. It’s handy for subjects wearing glasses, as this type of lighting is the quickest way to light someone while maintaining their glasses outside the angle of reflection. For this reason, broad lighting is standard for school portraits and corporate headshots. However, it also can make the subject’s face look wider than usual.
7. Short Lighting
Short lighting is the reverse/opposite of broad lighting. The part of the face that receives more light is also far away from the camera. Thus, your subject is still at an angle corresponding to the camera. But the light is now on the distant side of the face.
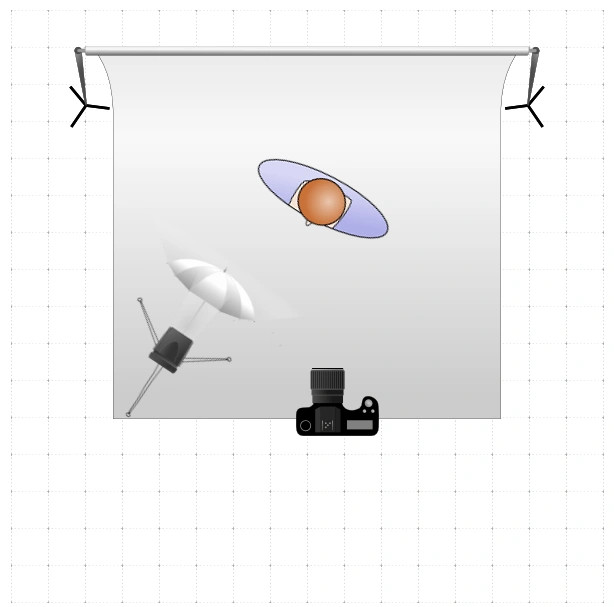
Image Source: Camerapro.com
Short lighting is great at creating a definition in the face depending exactly on the angle used. Avoiding glare from glasses with this type of lighting is impossible. Short lighting can “thin” a face out – which is both good and bad depending on the look you want.
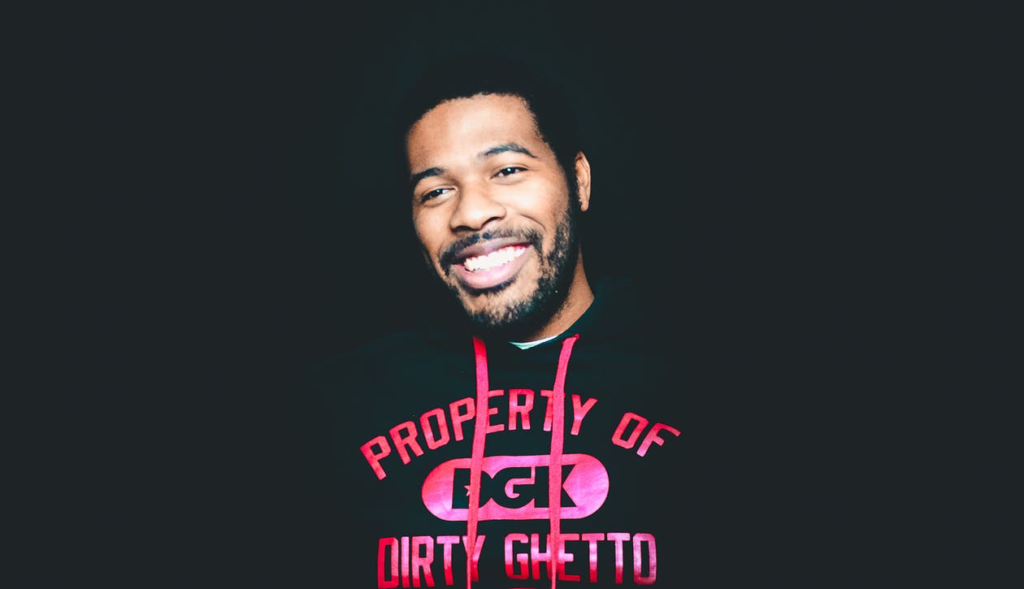
8. Fill Lighting
You can do a lot of work with just one light. First, however, you should decide whether or not you also want to use a fill light. Fill lighting doesn’t need to come from extra light. Instead of adding another light source as your fill, you can use a reflector to light off your key light and use that as your fill.
It is important to understand the basics of lighting ratios to use fill lighting effectively. The larger the ratio between two lights, the more pronounced the contrast between light and dark. Lighting ratios can get technical for beginners quickly. However, you can create dynamic portraits with interesting contrast and depth by having your key light at one brightness level and your fill lighting at a lower brightness level. This can be measured in two ways:
- By using a light meter: If your light meter shows f/8 when you measure the part of your subject, the key light is striking, and then it reads f/5.6 on the side where your fill light is unique, then you know that your key is twice as bright as your fill. This is because f/5.6 to f/8 is a 1-stop difference. Every stop of exposure is twice the amount of light.
- By using the lights themselves (by eyeballing). Less accurate than a light meter, but good for beginners looking to get a decent feel for lighting. If your key flash or strobe is at ½ power and your fill flash or strobe is at ¼ power, you have your 2:1 ratio.
9. Clamshell Lighting
Clamshell lighting is a setup where two lights are placed at a 45-degree angle facing your subject. Your key light will face downwards at a 45-degree angle, and your fill light will face upwards at a 45-degree angle. The resulting look of your lights from the side will somewhat resemble an open clamshell.
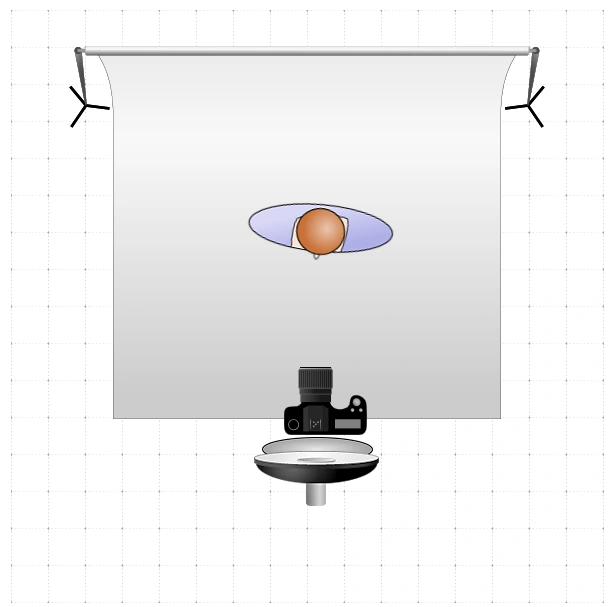
Image Source: Camerapro.com
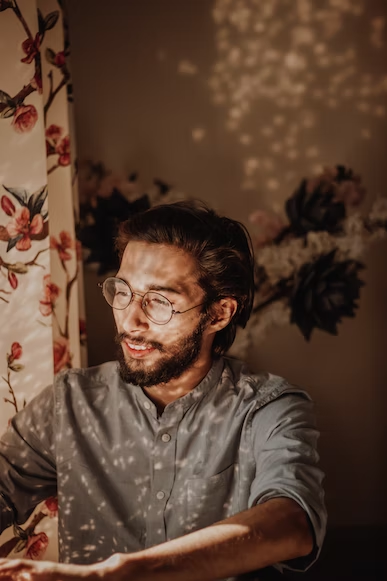
Image Source:pexels
10. Cross Lighting
Cross-lighting involves the setup of two light sources illuminating the subject from opposite sides. Cross-lighting is versatile because you can change light angles and modifiers to give you limitless options in lighting effects.
Final Words
Once you learn how to understand and create each of the different lighting patterns, you can then understand how and when to apply them. By analyzing your subject’s face, you will learn which lighting pattern will be best for them and the desired type of portrait and mood. For example, someone with a round face who wants to appear slimmer in a grad portrait will be illuminated differently than someone who wants a promo shot for their company that makes them appear to mean or angry. Once you understand all the patterns and recognize and master the quality of light, the direction of light, and the ratio (we’ll discuss that in a future article), you will be well-equipped to handle the challenge.
Of course, it is easier to change the lighting pattern if you can move the light source. But if the main light source is the sun or a window – it’s a bit more difficult to do that. So, instead of relocating the light, you will need to rotate the subject with respect to the light to switch the direction it falls on them. Or adjust your camera position or their position. So, move the things you can move concerning the light if you cannot move the light source itself.
Portrait Lighting Videos
Laws of Light: 5 Portrait Lighting Setups
Advanced Portrait Lighting – Full Tutorial – Three-Point Starburst
The 9 types of portrait lighting photographers need to know-whether they’re on location or in studio
Light Stacking: Two-Light Portrait Setup | Master Your Craft
6 SIMPLE Studio LIGHTING Setups for Portrait Photography to IMPROVE your lighting skills.