Have you ever noticed a tiny change in the depth of field in a scene that exposed a new detail? That is called rack focus. Let’s go through how to execute it, use it, and why you should put this method on your shot list.

What is Rack Focus?
The filmmaking technique of adjusting the lens’s focus during a continuous shot is known as a rack focus—the focal plane “racks” when it shifts from one object in the frame to another. Rack focus changes the lens’s focus during a shot. It refers to the minute or the drastic changes related to focus and the depth of field where one object blurs and the other gains prominence. The method, sometimes known as a “focus pull” or “pulling focus,” can involve subtle or significant shifts in emphasis. The transition between focus planes is more evident with the depth of field getting shallower.
Reasons to use Rack Focus
- To move from one scene to another
- To give a shot a theatrical flourish
- To attract attention to a particular detail
- To draw attention to a specific detail
- To merge numerous frames into a single shot
- To follow a character’s mental process
- To disclose something hidden in the frame
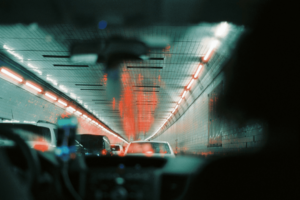
Depth of Field – Rack Focus Explained
The Role of a Focus Puller
A job dubbed “Focus Puller” exists on a professional set since racking focus is its art form. The 1st Assistant Camera is usually the Focus Puller (or the 1st AC).
During the shot, the Focus Puller works with the Camera Operator to change the focus ring. The focus puller should handle the actual focusing while the operator concentrates on framing and camera movement. It’s a delicate balancing act between the performers and the camera department that takes practice and finesse.
It takes a lot of patience and works to pull off a rack-focus shot.
Examples and the Function of a Rack Focus Shot
In visual storytelling, shifting focus within a shot serves a variety of purposes. There are numerous creative and dramatic reasons to draw attention, but there is also a convenient reason. One of the most apparent advantages is that you can obtain two (or more) shots for the price of one.
The purpose of pulling focus is to assist in directing the audience’s attention to something in the scene. As a result, the rack focus shot can be critical for drawing attention to elements in the audience. Let’s take a look at some of the more inventive and dramatic ways to use a focus pull.
To Follow a Character’s Mental Process
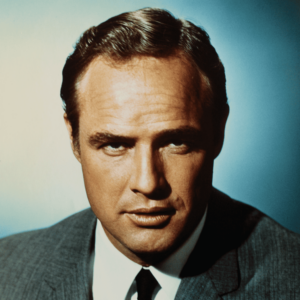
Take a look at this scene from the movie Road to Perdition. This scene is about Connor’s (Daniel Craig) poor relationship with his father (Paul Newman). He is also envious of his father’s relationship with Michael (Tom Hanks). Keep an eye on how these complex relationships play out, topped off by a great rack focus.
Rack Focus in Road to Perdition
The focus shifts to Rooney and Michael as they pass Connor. This focus pull was employed by director Sam Mendes to show us what Connor is thinking about rather than what he sees: jealousy, fury, and revenge.
To Add Theatrical Flourish to a Scene
As the main character and his siblings seek to get out of quarantine, The Host uses this long hallway to shift the focus back and forth between them. In this scenario, we leave the forefront and focus on the middle ground, then on the backdrop before returning to the foreground.
Not only does this catch four different pictures in one, but we also sense the excitement of their haphazard escape by keeping the action and pulling emphasis in a single shot. Their panic is signaled by the final rack focus when they are caught, and the chase begins.
To Establish Relationships
In Young Victoria, director Jean-Marc Vallee destroys the rack focus. Look at the many different ways the focus pull is used in this video compilation. It establishes character relationships, transfers us from one discourse to the next, and heightens the drama.
We can figure out who’s who at the table based on their relationships. As we can easily shift views, we can determine who is spying, conspiring, and gossiping.
We know the director has complete control over the suspense in this drama because the rack focus shot is used here. Unlike other camera movements, the pulling focus can be exact. It’s almost as if you’re shining a spotlight on a specific aspect.
Rack Focus in Animation
This technique is sometimes used when filming the foreground and background separately and then integrating them into two-dimensional animation.
Rack Focus should theoretically be obsolete in upcoming 3D films because viewers will alter focus at will. Of course, because it’s simply a 3D simulation, this isn’t entirely accurate, but the technique is still in use. This can be aggravating because the viewer wants to alter the focus but cannot.
How to Set up a Rack Focus Shot?
Let’s go through the rack focus definition again and make a plan. We need to arrange a few things ahead of time because we’re dealing with exact actions. The positioning of the subjects and the distances involved, to be specific.
To pull focus, you must first decide which objects you will switch between. You will also need to figure out how to change the focus ring the most effectively. Here’s a quick tutorial on how to pull focus like a pro. Here are the step-by-step instructions.
Setup the Necessary Equipment
First and foremost, a camera lens with a manual focus ring is required. Many consumer cameras have auto-focus capabilities, but you have no control over how or when it focuses, which is inconvenient.
Using a camera with auto-focus is recommended. Some early digital cameras had autofocus capability, but it was inexact compared to manual focus and didn’t allow for the selectivity required for rack-focus photos. However, Autofocus is making a resurgence in the age of ultra-high-definition digital cinematography, and advanced tools enable a more automated version of focus pulling.
You can be adjusting the focus ring directly with your hand for low-budget productions. With a lot of work, you can master this strategy, but it will limit your ability to handle the camera. So instead, a mechanical device known as a follow focus is used in many productions.
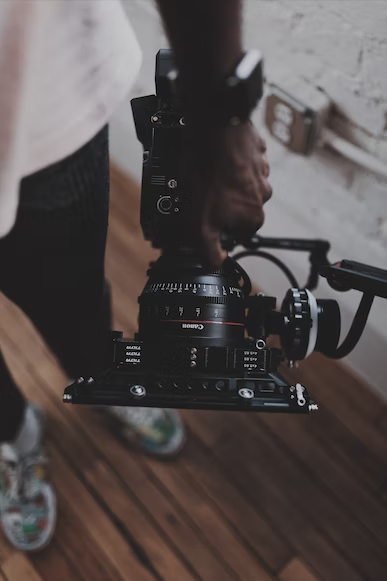
This is a gadget that attaches to your lens and allows for more precise and smooth adjustments. In addition, wireless follow-focus systems will enable the focus puller to work without touching the camera, which is great when the camera is moving.
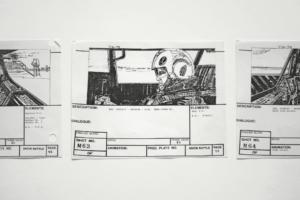
Arrange your Camera and Subjects
This is the moment to decide the subjects in the shot and their relative placements as you develop your shot list. For example, is the focus shifting between two actors, an actor, and a prop, or a different combination? After you’ve completed the basic setup, you’ll need to decide on the depth of field you’ll use.
Adjust the Depth of the Field
There are no guidelines for how deep your depth of field should be within the rack focus definition. Depending on what works best in the situation, you can utilize a shallow or a deep depth of field in your shot.

The rack focus will be more or less evident, depending on the distance between your subjects and the depth of field. The following video explains how the aperture is used to produce the depth of field.
Measure your Distance
You will measure the various distances between the camera and the subjects once the character blocking and depth of focus are complete. There are several different methods for measuring distance, which is usually determined by your budget.
If you’re on a tight budget, you might have to rely on your eyes to measure and focus. It is feasible to achieve flawless results, but it is more complicated.
Although most lenses have distances marked on them, the easiest way to get accurate measurements is to measure them yourself. You can measure the distance between the subject and the camera with a fabric tape measure. Start your tape measure at the sensor plane of the camera, not the front of the lens.
Most follow-focus units have a white surface around the dial where you may add personalized marks for each focal location if you’re using one. Here are some pointers on how to measure, mark, and pull focus.
Tips to Ace the Rack Focus
Practice
It’s helpful to know (and set) the focus points you’ll be racking between before going all hair-trigger with your rack focuses. This is a step in the process of composing your piece. Once you have found a shot you like, double-check that both of your focus points are feasible. To be certain, you can use your focus zoom previews. Before rolling, practice a few racks of focus after your points are set.
Make Use of Foreground, middleground, and Background
One of the most important elements to remember while creating fascinating rack-focus compositions is to use the planes of foreground, middle ground, and backdrop. Finding a creative approach to traverse across all three planes, starting in the front and moving your focus across the middle before landing on a subject in the background, is a worthy goal for setting your rack focus (or vice versa). Then, on your own, try out a few other photos.
Mix Up the Speed Levels
You have complete control over the speed and cadence of your focus shift when conducting a rack focus. Any kinetic technique will give you complete control over how fast or slow your focus racks are, whether you have your finger(s) on your lens’s focus ring or deploy some form of pulling device. Experiment with different speeds for different results when you’ve got your shot together and your points in place. A fast-track focus can elicit excitement and action, whereas a sluggish rack focus can frequently elicit suspense and intrigue.
Add Some Movement
Movement is another factor to consider while completing a rack focus. This can either be your subject’s movement in a static composition or the camera itself moving. A sophisticated and cinematic shot is created by combining camera motions — such as basic pans or tilts, smooth dolly, or slider moves — with a rack focus.
Make Use of Focus Rings
As previously said, using add-on equipment such as manual focus rings for more accurate control or even off-camera controls for exact focus pulling and adjustments might assist your rack focus approach. On larger productions, it’s usually for a focus puller to operate alongside the camera operator from behind a monitor, with digital focus control at their fingertips. For added stability and control, attach some affordable focus rings to your DSLR or mirrorless camera with your build-out. Consider the following options and resources for focus pulling.
Try Going Out of Focus
We would propose using an out-of-focus photo at the start or finish of your rack focus as an add-on approach. When working with a static, stationary shot, I’ve found that completing your rack focus move, then continuing to slide your focus as far out-of-focus as possible, works best. After that, you can reverse it in post for an out-of-focus shot to come into focus narrowly before finishing a difficult rack to another point.
Use Auto-Focus
Additionally, depending on your camera, you may have access to digital auto-focus technology. Some cameras even allow you to set your automated focus point by merely tapping on the LCD screen. You may also shift your focus by dragging it or setting your camera to follow a face or another object.
Conclusion
The rack focus is another intentional cinematography technique that can convey thousands of words, just like tracking shots or long takes can provide depth to a film’s narrative. Understanding how to use the rack focus to show information is another way cinema fans and students can better understand the difficult filmmaking process.