What is the Rule of Thirds?
In photography, the rule of thirds is a composition type in which a photo is divided evenly into thirds, horizontally, and vertically. Then, with the imaginary 3*3 grid of 9 segments formed by two horizontal and vertical lines each, the image’s subject is positioned at the intersection of those dividing lines or along with one of the lines itself.
When using the rule of thirds, there are four points of interest, and those are at the intersecting points. In an ideal situation, you would place your subject on one of these points of interest. However, when photographing kids or something else that is moving it isn’t always possible. That is perfectly fine.
Remember, this is just a guide. It isn’t a hard and fast rule. Plus, you can constantly adjust your image in post-processing to make sure your subject is on one of the points of interest.
Another thing to spot is that it’s possible to have a main point of interest and then place something else on an intersecting option point, which creates an invisible diagonal. Since our minds are always looking for shapes, this supports the image and makes sense to us.
Who Invented the Rule of Thirds?
The Rule of Thirds was first talked about in 1797, which is quite surprising. Of course, it was not about photography, but painting where the principles were the same. At that time, people debated the balance between warm to cold colors and how much painting each element should occupy. They said one-third should be for land and water, and two-thirds should be for air and sky. This is where the concept for the name came from.
Painting and capturing a photo may have some things in common, but the process is quite different. Inside the grid, you’ll find the lines intersect at four other points. These are your points of interest. You can visualize this grid while you see through your viewfinder. Or, you can use the camera’s LCD that’s used to frame the shot you’re about to take.
This rule is so popular that almost all digital cameras come with a rule of thirds grid overlay. You have to just enable it while you’re taking photos.
This grid will assist you in positioning the elements in your shot and framing the most critical parts of your photo.
The rule of thirds explains that if you place the main subject of your image in the top, bottom, left, or right blocks of the grid, you’ll capture a perfect picture every time.
The rule gets even simpler than that. To capture a well-balanced photo, all you have to do is avoid keeping the main subject in the center box. When people look at pictures, their eyes are naturally drawn to one of the points of interest and not the center of the image.
How Does the Rule of Thirds Work?
The human eye gravitates toward points right beyond the center of a photo. These points are called the intersecting points on a Rule of Thirds grid. As people read text from left to right, they also read images in the same direction. As a result, the bottom right portion of an image is the most visually arresting. In contrast, the upper left part is most likely to be overlooked.
How to Use the Rule of Thirds During Photography?
You may need to have little knowledge of the Rule of Thirds to capture eye-catchy images. For this reason, here are a few tips on successfully implementing or using the Rule of Thirds technique.
- Firstly, most cameras and mobiles allow you to enable a gridded overlay in the viewfinder, which helps you to compose on the move.
- Keeping the subject the same and putting it on the different third lines, take as many photos as possible.
- Then photograph the subject’s dead center in the frame.
- Shoot a lot of pictures. Later, take a look at them and decide which ones you like best.
- Then show them to someone good at photography and ask them to pick the best one out.
- When you’re cropping your photos in your editing software, you should also enable the same overlay on the cropping tool. This can be done in Photoshop, Lightroom, and Luminar tools.
Why is the Rule of Thirds Important?
As you know how to follow the rule of thirds, it’s essential to understand why it matters and what it can do for your images.
The rule of thirds is of two things:
- Balance
- Dynamism (movement)
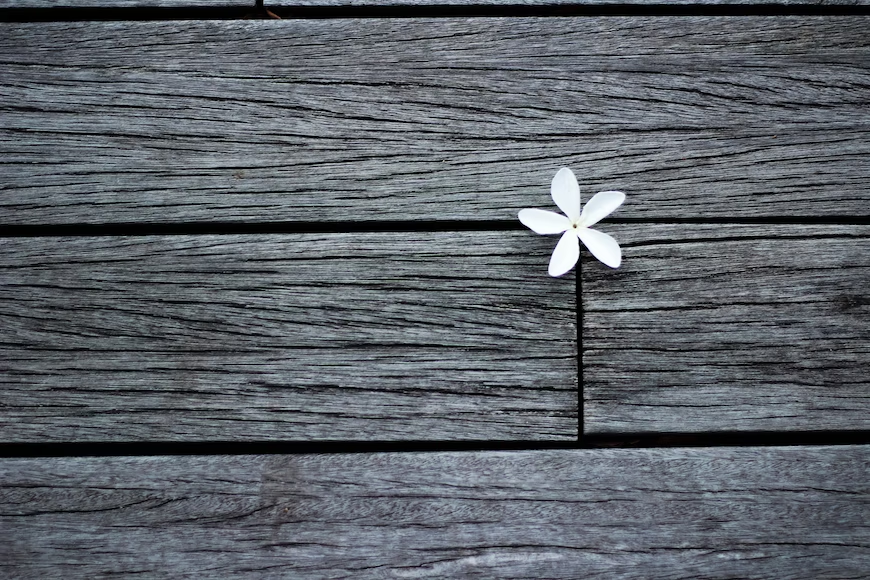
First, positioning critical elements at the rule of thirds intersections or gridlines makes your photo more balanced. Your key features form a visual interest in a third of the composition while balancing out the blank space in the remaining two-thirds. This looks great and feels appropriate to the viewer. The rule of thirds assists you in creatively utilizing the negative space in the background and eliminating the empty areas surrounding your subject. Thus, this technique helps you to prioritize the image and focuses on the subject.
Second, compositions that comprise key elements smack-dab in the center of the frame; such images often feel very inactive and dull. The viewer looks at the photo, sees the subject at its center, then leaves.
But the rule of thirds supports dynamism. The viewer observes a key element off to the side, then takes a visual tour throughout the rest of the picture.
In other words, the rule of thirds composition offers a more engaging photographic experience.
Also, the rule of thirds carries on the way humans naturally view images. For example, studies show that human eyes usually go to one of the intersection points rather than the center of the picture. So, the rule of thirds serves with this simple way of viewing an image.
How to Apply the Rule of Thirds to Portraits?
Since no human face is perfectly well-formed, apply the Rule of Thirds for outstanding portraiture:
- Align your subject’s left or right eye on one of the upper two intersection points.
- Align your subject’s shoulders along the lower-third grid line, providing the subject with a natural and relaxed appearance.
- Draw your viewer into the portrait by subtly angling your subject toward the other empty quadrants in the grid.
- Suppose you’re shooting a horizontal image for print photography. In that case, you want to ensure that there’s no critical information in the middle of the image (which is yet another reason to use the Rule of Thirds when composing your photos).
How to Apply the Rule of Thirds to Landscape Shots?
Landscape shots don’t have a clear subject, making it challenging to know what to put on the points of interest. It’d be better to put the horizon on the upper or lower third when capturing landscape images. Each time you shoot a landscape image, consider taking one shot of each.

Should I Apply the Rule of Thirds Always?
Using the rule of thirds, you can create dynamic photos that are appealing to the human eye.
But that doesn’t mean you have to apply the rule of thirds all the time. As with all other rules in photography, there’s always a chance to break them.
There will be moments when a portrait looks best when your subject is in the center of the shot. Or the landscape you’ve captured attracts your attention to the center of the image. So, the rule of thirds is not in place to limit your spontaneity or spoil amazing shots.
It’s just there to help you become better, assist you in viewing your shots differently, and help you take the best photograph possible.
Rule of Thirds Videos
The Rule of Thirds in 5 minutes | Creating More Dynamic Framing
The Rule Of Thirds | What is it? Filmmaking & Photography Training
Understanding the Rule of Thirds | Adobe Design Principles Course
Using the Rule of Thirds in Filmmaking
Final Words
If you want to sharpen your photography skills, one of the simplest ways is to apply the rule of thirds to all pictures you capture. Using the rule of thirds grid in your photographs is easy. Whether you do it with your camera or your editing software, there’s nothing wrong with trying it during your next photoshoot.