Panning in audio is the distribution of an audio signal into a new stereo or multi-channel sound field determined by a pan control setting. Each incoming source channel has a pan control on a typical physical recording console. A pan control, also known as a pan pot, is an analog control with a position indicator that can move continuously from the 7 o’clock position when entirely left to the 5 o’clock position. Pan pots are replaced by on-screen virtual knobs or sliders that function similarly to their physical counterparts in audio mixing software.
What Is Panning and How to Use it?
What Is Panning in Music?
In general, panning distributes a stereo or mono track across a stereo field’s left and right channels. To control the position of a track within a stereo image, you can use an audio pan pot or a slider for pan control.
Panning allows producers and musicians to create a more expansive sonic experience and new mixing possibilities with different pan positions. Most studio tracks today use some form of panning, but there are panning examples in older music, as discussed below.
How to Pan Music for a Wider Audience?
Hearing in Stereo
The ability to make an instrument sound like it is coming from a specific point between your speakers is due to how we hear the sound, specifically ‘binaural hearing.’ Binaural hearing refers to how we hear with two ears. We listen to sounds from different points in space because our ears are in two other places. The brain can determine the location of a sound from left to right by distinguishing between what the left ear hears and what the right ear hears.
If a sound occurs to your right, your right ear will hear it before your left ear. This is because the sound must travel further to reach your left ear. The difference in arrival time is known as the interaural time difference. In addition, if a sound occurs to your right, your right ear will hear it more than your left. This is referred to as the interaural level difference. The same is true if you hear a sound to your left. Your left ear will listen to the sound first and louder than your right.
What if a sound happens right in front of you? In this case, the sound will reach your left and right ears simultaneously and at the same volume. Also, your brain uses the difference to recognize the sound’s location as being in front of you.
How does Panning Work in Audio?
So, how do we apply this to panning? We usually use two speakers when mixing music—one on each side. When you play a sound in your mix, you can dictate how loudly that sound is played from one speaker compared with the other by using panning. Playing a sound from one speaker louder will cause your brain to perceive the sound as being on that side. As a result, we can place sounds at any point between the two speakers. A pan pot, which stands for panoramic potentiometer, is used to position the sounds.
What are Pan Pots?
So, how do we make use of a pan pot? Assume you are sitting between two monitor speakers, mixing a song. When the pan pot on a mono channel is at the center position, the signal’s output is at the same level from both speakers. As a result, both your ears hear the sound at the same volume. This means you listen to it as if it were right in front of you. This is referred to as the phantom center position as there is no speaker in the center from which the sound is emanating. Instead, the sound is coming from the speakers on the left and right sides. You are hearing the sound at the same level in both ears as your brain perceives it coming from the center.
Assume you begin to pan that track to the right. The signal coming from the left speaker will become quieter as you turn the pan pot to the right. Because you are now hearing the sound louder in your right ear than in your left, you will perceive it to the right. The more you pan to the right, the quieter the left channel becomes; thus, the sound appears to be located.
What Happens When a Stereo Track is Panned?
We know what happens when a mono track is panned. Yet, what happens when you pan a stereo track? Let’s get to know the details.
It can be a piano recorded in stereo with two microphones rather than a mono with one microphone. A stereo channel in many DAWs, such as Pro Tools, will have two pan pots. The position of the signal’s left side is controlled by one, while the other pan pot controls that on the right side. It is handy, allowing you to control the instrument in the stereo image, despite its variation in width or narrowness.
Panning Stereo Tracks
Let’s stick with our previous example of a stereo recording of a piano. The pan pots could be positioned to the left and right. The piano would be spread across the entire stereo image if you did this. Assume you moved each pan pot inwards by 50% towards the center. This would keep the piano in the center, but it would make the piano narrower than before. The closer the pan pots are positioned to the same point, the narrower the width of the instrument becomes.
Assume you have panned both pan pots to the left. The left and right sides of the signal are now on the mix’s left side. The piano appears to be located further to the left as the pots are moved further. Again, the narrower the piano’s width sounds, the closer the pots are panned to the same point. The wider the piano sounds, the further apart the pots are panned.
As you can see, if your DAW has two pan pots on a stereo channel, you can place a stereo instrument anywhere in the stereo image and with any width you want.
Pan Pots vs Balance Pots: A Comparison
This level of control, however, is not available in all DAWs. For example, some only provide a single ‘balance’ pot on stereo channels. The left side of the stereo channel is connected to the left speaker when a balance pot is used. The right channel is only fed to the right speaker. As a result, unlike in our previous example, no signal from the left side can be transferred to the right speaker. So, none of the right-side signs are moved to the left.
As a result, the only thing you can do is change the balance of the left side of the signal concerning the right side of the signal. As you pan to the right, the left side of the signal decreases. When you pan to the right, the signal on the left side becomes inaudible. This does not give you similar control over the width and positioning of stereo tracks in your mixes as having two pan pots does.
Previously, this was the only option for stereo tracks in logic. It was essential to insert the Direction Mixer plugin to gain more control. In recent updates, you can now switch between ‘balance’ and stereo pan. When you select a stereo pan, you can adjust the position of the stereo instrument with its width and the ring around the pot. Although it has a slightly different layout than having two pan pots, it allows you to control the position and width of a stereo track.
Strategies for Audio Panning
So we now understand how we can use panning to make it sound similar to an instrument coming from a particular location from left to right. We also understand how to use panning in a DAW. But how should we use panning in our mixes? It is highly subjective.
Besides personal preference, panning is influenced by factors such as genre and track instrumentation. There are, however, beneficial tips and strategies you can use to find the best approach to panning effects. Here are my top ten tips for incorporating panning into your mixes:
1. The Middle Position
A few instruments are almost always panned to the center of the mix. For example, the kick drum, snare drum, bass guitar, and lead vocals are typically panned to the center of the mix. So, naturally, we place the essential components of the mix in the center. Of course, deciding which track is more important than another is highly subjective. However, we can all probably agree that the lead vocals play one of the essential tracks in a mix.
Low-frequency instruments such as kick and bass guitars are typically kept in the center for practical reasons. Low-frequency sounds are more difficult for us to locate than high-frequency sounds. As a result, it makes sense to keep them in the spotlight. Furthermore, panning low frequencies away from the center may result in uneven power consumption between speakers and the needle bouncing out of the groove when the song is pressed to vinyl. As a result, it is best to keep frequencies of 120Hz and lower panned centrally in the mix.
Of course, it is not uncommon to hear a bass guitar panned off-center from time to time, especially on jazz albums. If you do this, ensure to roll off some low-end for the reasons stated above.
2. The Sound Stage
Picture the space between the left and right speakers as a pedestal. This is a valuable concept for panning instruments. Next, consider how the musicians arrange them at a venue or festival. This can significantly assist you in deciding the instruments’ location from left to right. Finally, if you are unsure where to place it, consider how the musicians arrange them for a live performance. For example, you need to make an exception for the bass guitar and keep it central rather than panning it off to one side, where the bass player will most likely be standing on stage.
3. Organize a Symmetrical Mix
It is best to aim for symmetrical mixes considering the number of things panned to each side. A mix with more things panned to one side can be unsettling to enjoy the music. So, better symmetrically position the instruments. For example, instead of having a guitar on one side and a guitar plus a piano on the other, try panning one guitar to each side and the piano to the center if you have two guitars and one piano.
Of course, it is not always possible to make your track symmetrical with your available tracks. Suppose you have a mix with fewer instruments on one side than the other, and it feels like you need to add something to the side with fewer tracks panned to it to keep the symmetry. Try adding a delay to an instrument on the fuller side and then panning the delay return to the sparser side. Pan the track’s reverb from the fuller side to the lighter side. This can aid in maintaining a sense of symmetry in your mix.
4. It Is Not Always Necessary to Pan Stereo Tracks Around the Center
Many people pan all stereo tracks such as piano, acoustic guitar, strings, etc. However, this does not always produce the best results. While panning these around the center with your preferred width sounds excellent, there is nothing wrong with panning them to one side. This is especially useful if your mix includes more than one stereo track. For example, consider a song with a stereo piano track and a stereo strings track. First, try panning the piano to 9 and 11 o’clock. Then, with the acoustic guitar, pan to 1 and 3 o’clock.
5. Focus on the Drums
Many mixers pan the overhead drums to the left and right, resulting in a loud sound. However, it can make the location of the drums sound indistinct. Try to pan the overheads to 10 o’clock and 2 o’clock instead. This keeps some width and makes the drums much more focused. Then, pan the toms and hi-hats for a focused drum sound to appear in the overheads.
6. Pan Drums Through Audience Perspective
When mixing drums, you have two options for panning the kit. You can pan it from the audience’s perspective or the player’s perspective. In mixes, you will hear examples of both. This implies that the rack tom should be panned to the right, while the floor tom should be panned to the left. Likewise, the hi-hats should be panned to the right, while the ride cymbal should be panned to the left. It is outstanding if you prefer to mix your drums from the player’s point of view. Ensure that whichever method you use, you pan everything in one direction.
7. Pan Resembling Parts on the Opposite Sides
Panning similar instruments to opposite sides in the mix can help avoid masking if they were panned too closely together. Placing them on opposite sides of the stereo image helps to separate them. If you possess a keyboard with similar frequency content, pan them apart to give each its own space in the stereo image.
8. Do Not Depend On LCR Panning
LCR panning is one of the most commonly taught planning strategies. It pans the instruments in one of the positions:
- Hard left
- Hard right
- Center
This approach does not sit well with a few of you. When you only pan to the center, far left, or far right, it sometimes leaves a gap between the center and the outer edge, sounding unnatural.
9. Maintain a Balance Between the Frequencies and Levels
In terms of the frequency and volume of your mix’s left and right sides, it’s best to keep them balanced. It can be unsettling to listen to a mix in which one side sounds noticeably brighter, louder, or darker. Of course, variation is unavoidable, and we frequently use it in our mixes to keep things interesting. However, a discernible difference in frequency content and level between the two speakers can be exhausting. For a more natural-sounding mix, try to balance both of these elements.
10. Use Automation for Panning
Do not be afraid to use automation to change panning throughout the song. Moving things around when a new instrument arrives to maintain symmetry is common. Another option is to automate panning to appear more comprehensive in the choruses and narrower in the verses. This increases the chorus’s impact and can make your mix more exciting to the audience.
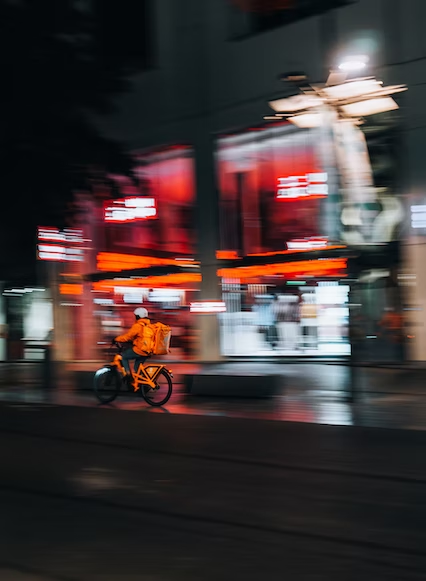
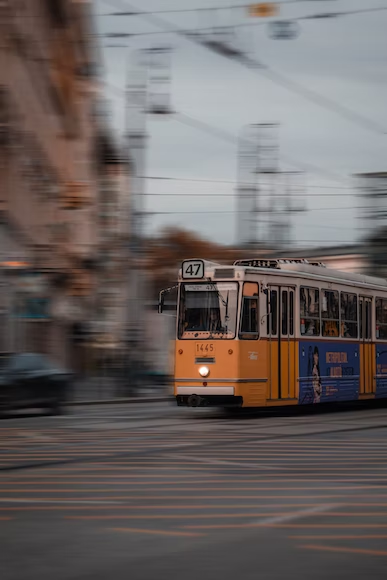
What Is Panning in Photography?
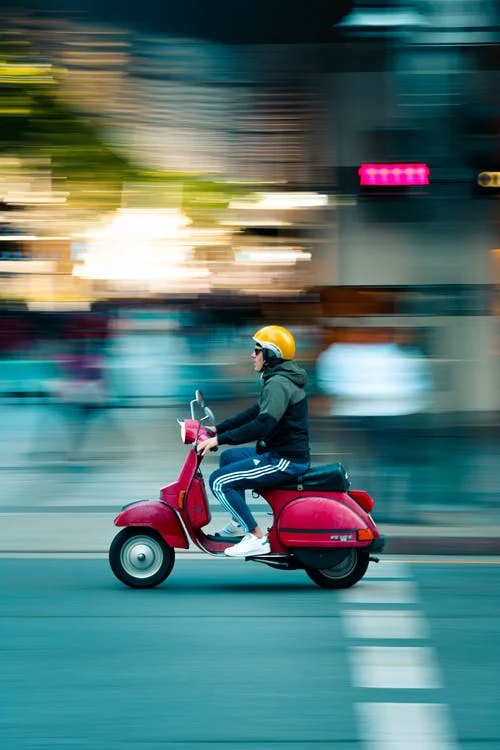
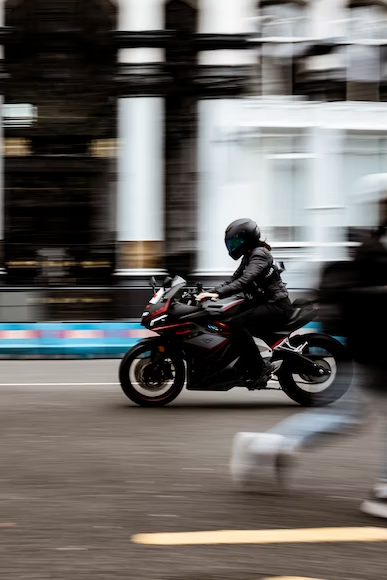
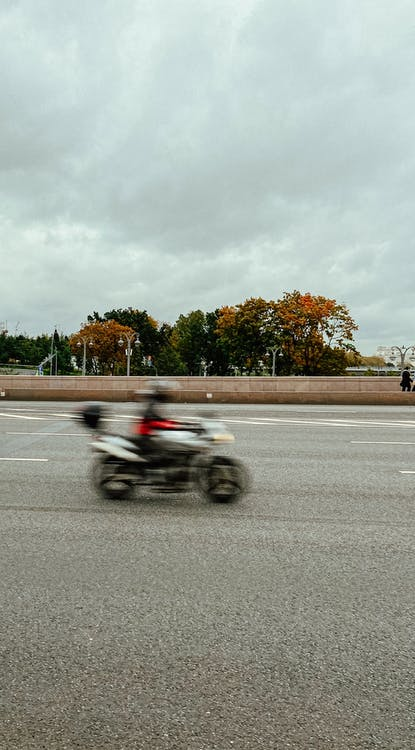
Panning is a photographic technique that uses a slow shutter speed and camera movement to sense the momentum around a dynamic object. It is a technique for keeping your subject focused while blurring the background.
Panning is typically performed on a horizontally moving subject, such as a moving car or a running dog. It can also be done vertically, such as when tracking someone jumping up and down or diving into a pool from a high board.
This is a complex technique that takes a lot of practice to master.
What Is Panning in Photography
How to Pan in Photography?
- Select your moving target.
- Set your shutter speed to something less than 1/60th of a second.
- Position your body and camera at the same speed as your subject.
- Maintain focus on the subject while holding down the camera trigger to shoot frames as you move with the subject continuously. Continue shooting for the duration of the rotation.
What Is the Technique in Panning?
Tips for Beginners in Camera Panning
- Try this technique on a relatively slow-moving subject, such as a person walking or cycling. The faster your subject moves, the quicker you have to move.
- To begin, set the shutter speed from 1/60th to 1/30th of a second. The slower the shutter speed, the more difficult it is to maintain focus during the exposure. Using these shutter speeds will allow you to practice the feel and motion of the camera.
- Make use of the largest f-stop possible – the smaller the f-stop, the more difficult it is to achieve sharp focus. The less you have to think about the focal plane, the more you can focus on the movement.
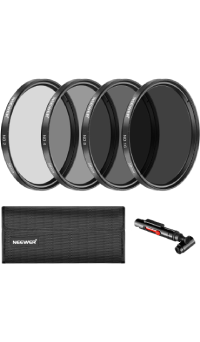
- If you are shooting in sunlight, you may need to find some shade or use a neutral density filter to get a low enough shutter speed. A neutral density filter functions similarly to sunglasses for your camera lens.
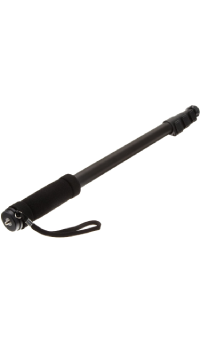
- When you first try this, a monopod may come in handy. Even with a motion head, a tripod would probably be too cumbersome.
Panning Photography in Beginners
How to Attain Stability While Panning?
Begin in a standing or kneeling position. Hold your camera with both hands as you would normally. Press your elbows firmly into your rib cage. Plant your feet or knees firmly in a slightly wider stance. While panning, rotate your entire upper body, not just your hands; everything from the hips should rotate. Inhale, hold, and breathe. You must be in a position where you are not tilting or wobbling while moving—the more locked-in and compact your condition, the more stable your rotation.
Progressing Further While Panning
- Experiment with panning with faster-moving objects, such as motorbikes or galloping horses.
- Experiment with a slower shutter speed to test your ability to freeze a moving object while blurring everything around it.
- Use a lower f-stop to achieve a shallower depth of field and more extreme background blurs.
- Instead of shooting a continuous stream, try shooting just one frame. You can always nail a pan with just one frame.
- Vertical panning is significantly more difficult than horizontal panning, so put your skills to the test.
Ideal Camera Settings
- Manual camera mode
- 100-200 ISO
- 1/30th – 1/10th of a second shutter speed
- F-Stop, f16, and f22
- Auto white balance
- Focus – Automatic
- AI Servo – continuous autofocus – first image priority – focus – speed
- The continuous high frame rate of 6 frames per second
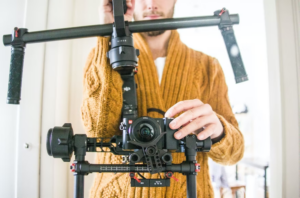
Ideal Camera for Panning Photography
Conclusion
Panning is quite a simple concept, but it can be tough to grasp. In its most basic form, panning distributes audio information within a stereo sound field in accordance with a preset pan control setting.
Panning is another camera technique for capturing motion blur and conveying movement while keeping a moving subject sharp. Choose a moving subject and a slow shutter speed to capture its action. A fast subject, such as a vehicle, will not necessitate a slower shutter speed than a person running. Enjoy your pan shots, knowing the nuances in the camera settings as discussed in this post.