White balance (WB) is the camera setting to eliminate unrealistic color casts so that something which appears white in person is rendered white in your photo. In simple words, white balance allows you to select the most accurate colors for that scene. Proper camera white balance has to consider the light source’s “color temperature,” which refers to white light’s relative warmth or coolness.
Human eyes are very good at identifying white color under different light sources. Still, digital cameras often have great difficulty with auto white balance (AWB) — and can create unsightly blue, orange, or other color casts. Mastering digital white balance can help you avoid different color casts, thereby improving your photos under a broader range of lighting conditions.
Adjusting white balance in digital photography will make your image look more natural. To get rid of color casts, we change colors to bring reality to our pictures. Adjusting the white balance is very easy, which you can set in your camera and post-processing software.
Relation Between Color Temperature and Measurement(Kelvin)
Now that you understand the white balance, it’s time to know how it works. First of all, to measure the color temperature of an image, use Kelvin degrees. Most photographers are interested in between 2000 and 10000 Kelvin degrees in terms of photography. Of course, the higher the temperature, the warmer your shot will be.
Balance the image colors by selecting a white balance between 2500K and 4500K if you are shooting in the presence of solid warm light. If not, everything may look red or orange. On the other hand, if you are shooting in an environment with more fabulous light (like overcast skies, a blue hour, or twilight), you should select a white balance between 6500K and 9000K. This avoids filling up the complete frame with bluish tones.
When shooting outdoors during the day without any strong color cast, you can select a temperature of around 5000 to 6000K. Nowadays, each camera has an automatic white balance mode that will try to choose the best white balance setting all by itself. Every camera also has many pre-programmed modes, with fixed Kelvin temperatures; we will explore all of these modes a little later.
Here’s a summary of some of the most common lighting situations you might find and what the corresponding Kelvin number is:
- Candlelight: 1900
- Incandescent light: 2700
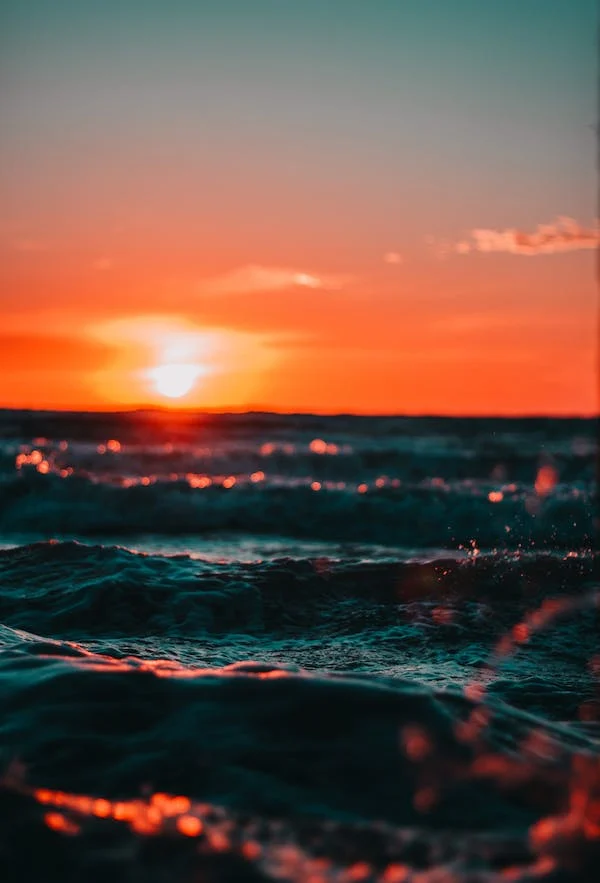
- Sunrise/Golden Hour: 2800 to 3000
- Halogen lamps: 3000
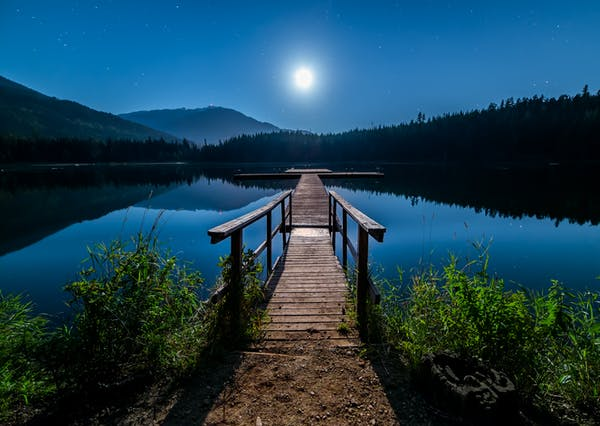
- Moonlight: 4100
- White LEDs: 4500
- Mid-day: 5000 to 5500
- Flash: 5500
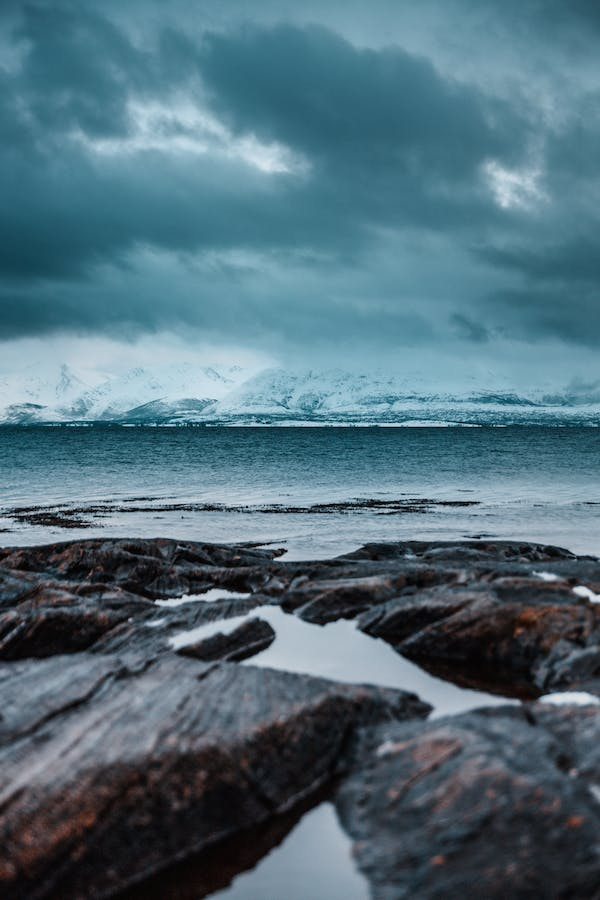
- Overcast/cloudy: 6500 to 7500
- Shade: 8000
- Heavy cloud cover: 9000 to 10000
- Blue sky: 10000
Color temperature & White balance: everything you need to know
White Balance & Kelvin Color temp explained 💡
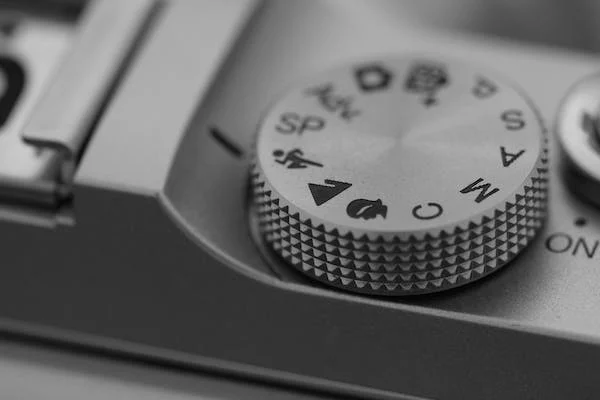
How to Find and Set the White Balance on Your Camera?
Look out for White Balance on your camera if you can’t notice the color temperature setting. Your camera may have several presets to select the color temperature for every situation.
The White Balance options usually include any of the following:
- Auto or AWB (Auto White Balance)
- Cloudy
- Shade
- Incandescent or tungsten (light bulb)
- Fluorescent
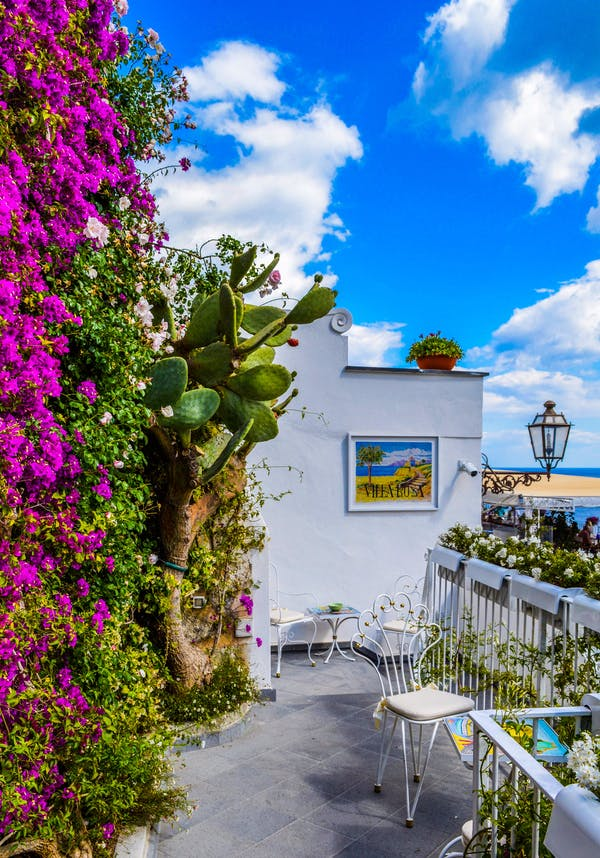
- Daylight (or direct sunlight)
- Flash
- Custom
- K or Kelvin
To understand better the critical lighting situations and the options offered by white balance, here is a brief explanation for you:
Automatic Mode
The automatic mode will try to guess the correct white balance for the scene. So, you won’t have to do anything except select the auto white balance setting.
After you take a snap, there will be two possible outcomes:
- The white balance will be perfect. In this case, you can continue capturing images.
- The white balance will be off, in which you should go into the settings and try other presets.


Tungsten
The tungsten mode will set the white balance around 3000K degrees, which means you should only use it when there are hot sources of light, such as tungsten light bulbs, candles, etc.

Fluorescent
The fluorescent mode will set your camera’s white balance to 4200K degrees with a slightly less extreme preset than the tungsten one. In addition, you can use the Fluorescent mode to contrast strong warm lights if the scene appears to be too orange.
Daylight / Sunny
The daylight mode is the best setting for occasions when shooting outside during the day, with direct sunlight hitting your subject or the scene. It will set the white balance to about 5000K degrees.
Flash
Unsurprisingly, the flash mode is the best to use when you have a flashlight on your subject. This is because your camera will set the white balance at 5500K degrees by choosing the flash mode.
Cloudy
You’ll need a slightly different white balance when shooting during cloudy days than sunny daylight. This is because the cloudy preset will set the color temperature of your camera to 6000K to give your images an extra shot of warmth.
Shade
The shaded mode sets your white balance to 8000K. It is the opposite of tungsten. Suppose you see strong, more fantastic color casts in your images, typical of blue hours or shaded areas. In that case, this mode will help you take out those unwanted blue tones and achieve a more natural look.

Auto White Balance (AWB) will assess the view, and the camera will set the color for you. Usually, Auto White Balance (AWB) will produce an acceptable image. Still, selecting the right option for your situation may result in a more precise and pleasing color to your pictures. You may find the white balance setting in your camera’s menu. Still, there is likely a shortcut or one-touch button located on your camera. Or you can check the Quick Menu. First, check the user manual to understand where to find the settings or use the Quick Menu. Then, choose the one that best represents your scene once you’ve found the option.
Your camera may display them slightly differently – again, consult your user manual if you aren’t sure.
How To PROPERLY Set White Balance | Filmmaking 101
Adjusting White Balance in Camera
To adjust the white balance in your camera, you need to account for the white balance in the camera settings. With white balance, you are matching the camera to the light source. Many newer DSLR cameras have powerful automatic white balance (AWB) functions. But if you are willing to explore customized settings, manual white balance adjustments are also an option; you can choose a location depending on your light source. If it is foggy, there is a cloudy day setting. If you are shooting in bright sunlight, there is a Daylight setting. You can adjust based on where you are. But most of photographers usually use auto white balance and then improve things in editing after.
To achieve good in-camera white balance when shooting, consider these factors:
Shoot your photos in the RAW file format
Setting your camera in RAW file mode before shooting is essential for post-processing flexibility. RAW file format stores all the image data taped by your camera’s sensor. RAW enables you to adjust the white balance in post-production efficiently.
Aim for consistent lighting
Shooting photos with inconsistent light sources will make it more challenging to edit the white balance during post-production. Try getting your light sources to match. If you have somebody lit with an incandescent bulb sitting next to a window on an overcast day, you are going to have one-half of your photo hot and the other half freezing. In post-processing, it is hard to fix that.
Use a gray card to be precise
A gray card is a square of material precisely shaded at 18 percent gray. This tool helps you find a perfect white balance for scenarios where being exact is the ultimate goal, like product or food photography. To set a white balance using a gray card, take a shot with the card filling the entire frame. Then move to your camera’s menu, select the option to set a customized white balance, and set it by choosing your photo of the gray card. You can also use shots of your gray card to help fix your white balance in post-production.
Don’t overcorrect
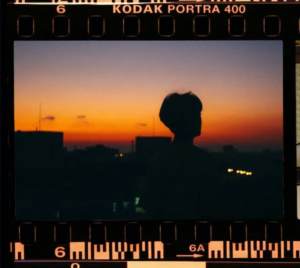
There are situations where an unbalanced color temperature works in your favor. For example, say you’re shooting a sunset. An essential part of the photo is the warm light of the sun. Therefore, you wouldn’t prefer to auto-correct it, turning everything blue.
When to Use Auto White Balance?
Most cameras are set to default to the “Auto White Balance(AWB) setting, which works pretty well most of the time. In auto-white balance mode, your camera analyzes the scene you’re trying to shoot and chooses a color temperature (in Kelvin) it believes will work best.
However, your camera can get confused easily if the scene:
- Has mostly one color (e.g., white snow, a lot of green grass, blue sea, or sky.)
- Doesn’t contain any white or close-to-white colors.
- Is illuminated by multiple light sources with different color temperatures.
All these situations can lead to a color cast in your photo, and you’ll want to take charge of the white balance.
When to Use Manual White Balance?
If you aren’t sure about when to adjust the white balance manually, there’s something you should learn. The semi-automatic modes might work fine in most situations, but many require manual adjustments.
As you know, we use the white balance in photography to neutralize the color casts surrounding us. However, the light and tones quickly change when photographing outdoors, which means the white balance has adjusted accordingly.
It’s not uncommon to have a significant change in color temperature every few images. In other words, there’s no consistency.
The most common situations where you need to choose manual white balance are:
- For Panoramic Photography
- For Time-Lapse Photography
- For HDR or other conditions where you bracket images
Automatic modes tend to struggle during the night and often give a warm cast to the images. Prefer using a cold Kelvin such as 3500K to keep night images more natural, mainly while photographing the Northern Lights.
When photographing bracketing multiple exposures or panoramas, the images should have the same color temperature. So use the manual mode in those scenarios also.
How To Change The White Balance in Lightroom?
Changing the white balance in Lightroom is easy. Go to the Basic panel in the develop module, and you’ll have three different ways to adjust the WB in Lightroom:
1. Using the Lightroom White Balance Presets
It is the same as the Semi-auto WB modes in the camera. Lightroom offers different presets to adjust your color temperature like tungsten WB, daylight, cloudy, etc.
2. Manually With the Tint/Temp Sliders
The most straightforward way to manually adjust your white balance is in Lightroom. You can move the tint and temperature sliders according to your needs.
3. Using the Ee-Dropper
This is the most reliable way to change the WB in Lightroom. Once you choose the eye-dropper tool on the left side of the temp/tint sliders, LR will open a collection with different colors so you can pick a neutral gray. Once you finish, LR will adjust your white balance automatically, and later, you can fine-tune the final white balance if required.
How To Change The White Balance in Photoshop?
Adjusting the white balance in Photoshop can be done in 3 different ways:
1. Using Adobe Camera Raw
Adobe Camera Raw uses the same software engine as Lightroom, so you can use the same process for changing the white balance in Photoshop. Keep in mind that some options like the eye-dropper are located in different places.
2. Using a Color Balance Adjustment Layer
An easy way to change the white balance in Photoshop. Using this adjustment, you can tweak your white balance by compensating for the main RGB channels with the opposite colors.
3. Using Curves or Levels
This is a more complex method than the previous one. Going to image → adjustments → curves or levels, you have several eye-droppers to set your picture’s white, gray, and black points. Photoshop will adjust the white balance automatically, and you can fine-tune your white balance using either the curves or levels adjustment.
White Balancing in Photo Editing Software
Photo editing tools can improve an image to make it look stunning. Usually, it is not recommended to keep your white balance tasks for post-processing unless you shoot RAW pictures. DSLRs that shoot in RAW can do without bothering over white balance. Or, you can shoot using the auto white balance mode.
Your post-processing(photo editing) software will be able to add the color temperature you need without trouble. In addition, RAW images don’t contain color, so they are easier to rectify using the software. So, you might not worry about white balance if your pictures are in the RAW format.
Cameras that shoot in other file formats may not be suitable for post-processing. Your images may never get the color temperature you saw with your eyes. As a result, only RAW images are ideal for white balance processing using a photo editing tool.
EASY FIX for White Balance: Photoshop Tutorial
Perfect White Balance in Lightroom | Lightroom Tutorials For Beginners #5
Frequently Asked Questions
How do you fix the white balance?
You can fix the white balance by setting a custom white balance on the camera. A quick way to perform this is to pick a symbol from the camera’s menu that suits your shooting conditions — e.g., cloudy, tungsten, etc. You can also fix white balance when editing your photographs but understand that you will have more flexibility if your image is a RAW file and not a .jpeg.
Can white balance affect exposure?
White balance can affect exposure, mainly if you shoot in .jpeg format. This is because converting the image data to .jpeg applies a white balance irreversibly, and this setting can determine how bright some colors appear. When shooting in RAW format, there is much more flexibility. Still, the white balance might affect how you perceive the exposure, potentially losing color information that appears to be present in the camera but is lost when the white balance is adjusted later.
Does white balance matter in RAW?
The white balance in your camera will not bear your image most of the time, as you can adjust it later when you edit your image. However, if you are picturing a high-contrast scene, adjusting the white balance when editing might add darker or brighter colors to certain parts of the image, and you might miss information in the edited image.
Does white balance affect noise?
White balance can affect noise but only during more extreme circumstances. For example, some noise may become more prominent as you adjust the white balance; it changes to a hue, making it more visible.
How often should you change the white balance in your camera?
You can set the custom white balance in your camera every time you shoot in different lighting situations.
How to fix the white balance on my iPhone?
The default camera app on the iPhone doesn’t allow you to set a custom white balance. However, various third-party apps offer this feature.
What is a white balance filter?
This is an option to use a white balance card and is a semi-translucent filter that lies in the front of your lens. Once attached, you position yourself in a scene so that the light falling on your subject also falls on your filter. Take a picture, and then tell your camera to use that image to set a custom white balance.
Final Thoughts
White balance assists you in getting your desired color temperature for an image. Choose the right setting on your camera to click natural and life-like pictures. Analyze the source of your light and lighting conditions, and then choose a suitable location.